laminate stock |
Post Reply 
|
Page 123 8> |
| Author | |
(pink)MIST 
Forum Moderator 
Joined: 10 Mar 2013 Location: Hamilton Status: Offline Posts: 465 |
 Post Options Post Options
") Thanks(0) Thanks(0)
MIST") Quote Reply Quote Reply
 Topic: laminate stock Topic: laminate stockPosted: 14 Apr 2014 at 6:01pm |
|
Okay, got bored again, which is easy for me as I dont like to sit still :)
Had a google search for custom laminate tx stocks, and found a few, but one stood out and just said "make me" Going to run through this step by step, as I get further through it, so to start it off heres what i found and am going to make - altered slightly to suit needs I thought needed changing. 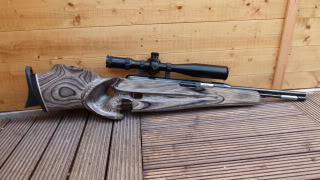  First step was easy, get a whole lot of ply, and laminate it together. I used aliphatic resin to glue it all up, and had it sitting under 2 1/2 ton of pressure for 8 hours. Then I marked out a template to the shape and size i wanted, marked the laminated ply (I got two stocks marked out off a 300x850 slab) and rough cut it out on a bandsaw you can see the cardboard template just behind the two stock blanks 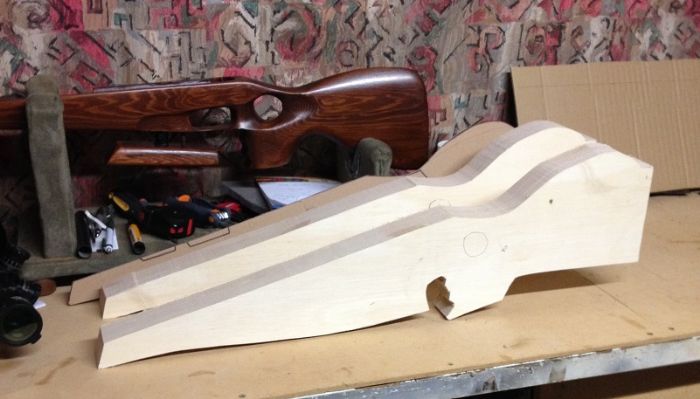 Starting with a 30mm drill through the thumbhole area, then used a plane to rough shape the comb and butt of the stock, and a 80grit flap wheel to start shaping the thumbhole/grip area. This small bit of work took just over 2 hours, and thats only one side. This can be done faster using an anglegrinder with sanding discs, but I feel theres more control this way. I'll use an anglegrinder later on. 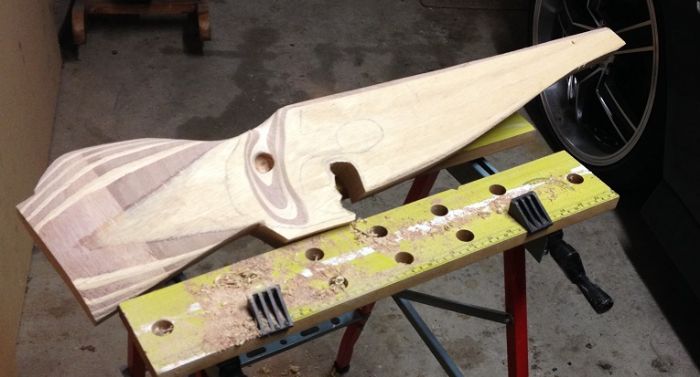 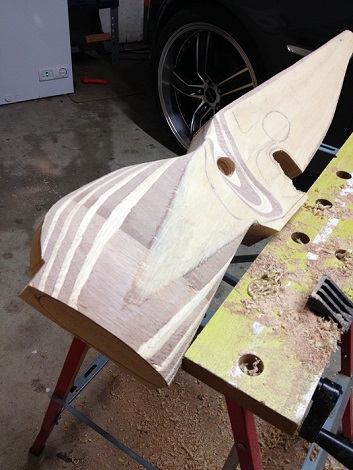 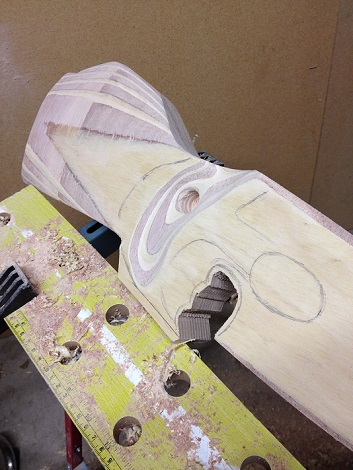 |
|
|
NZAFTA President
1st place HP springer - 2014 WFTF Worlds 1st place HP springer - 2014 Nats AA TX200 MK111, Optisan Viper 8-32x60 JSB. VMach, TbT, maestro design. |
|
 |
|
|
(pink)MIST
Forum Moderator
Joined: 10 Mar 2013 Location: Hamilton Status: Offline Posts: 465 |
Post Options
Thanks(0)
Quote Reply
Posted: 16 Apr 2014 at 6:43pm |
|
Another couple hours in the garage, with a half round file, some drum sanders, a plane, and the flap wheel.
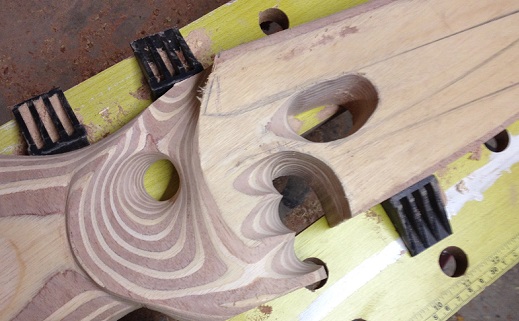
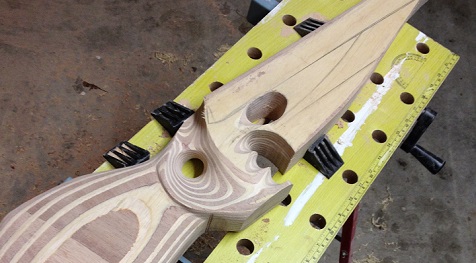
Have worked the grip, thumbhole and butt a bit more, giving better shape to it all, and have started the RH side finger grooves. Started marking the trigger area with the spade bit in the drill, this will help to keep the trigger hole straighter and a more true shape, and will also help when putting bodyline down each side providing a reference point. The lines are starting to show up better now, so also trying to make sure they go where I want them as well :) 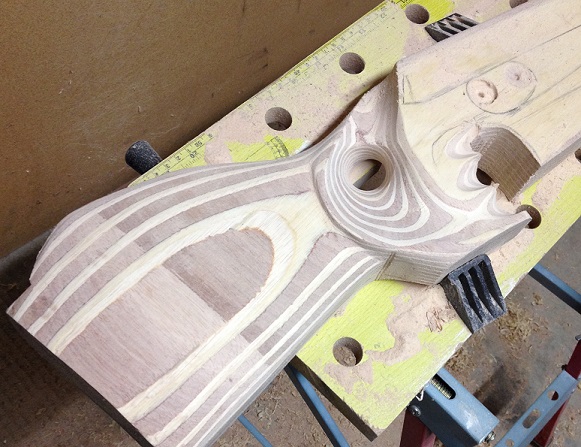 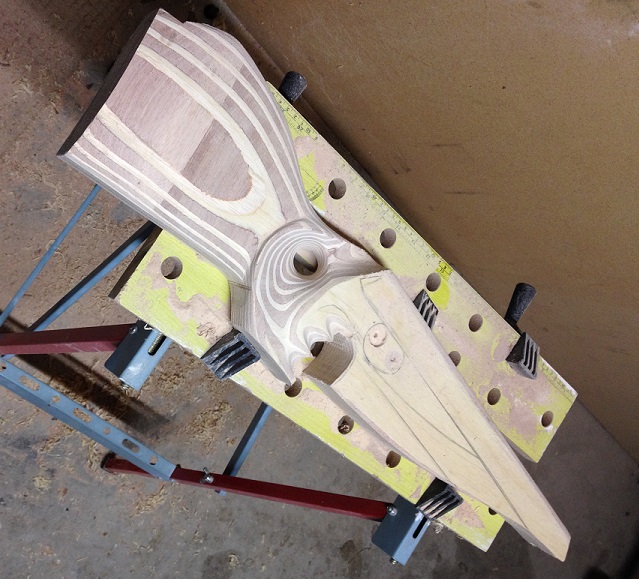  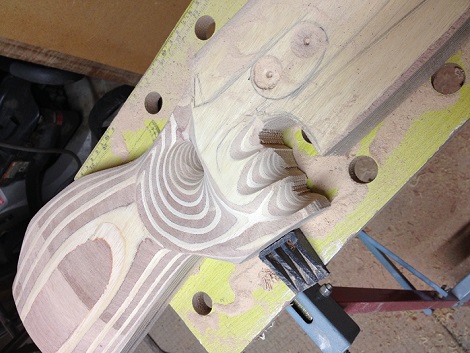 Also got this shot, using the lighting to show off the shape better. You can see where the trigger will be, and where the body line will shape to. The Body line will be cut using a router and fence, with the top following the top of the stock, and the bottom following the shape of the bottom of the stock. 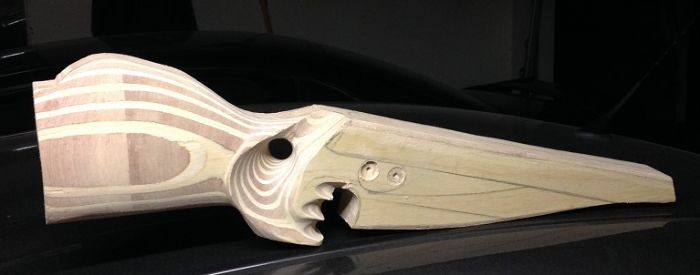 |
|
|
NZAFTA President
1st place HP springer - 2014 WFTF Worlds 1st place HP springer - 2014 Nats AA TX200 MK111, Optisan Viper 8-32x60 JSB. VMach, TbT, maestro design. |
|
|
|
|
(pink)MIST
Forum Moderator
Joined: 10 Mar 2013 Location: Hamilton Status: Offline Posts: 465 |
Post Options
Thanks(0)
Quote Reply
Posted: 18 Apr 2014 at 6:20pm |
|
3 more hours tonight, really taking shape at a good pace now. Will do pics tomorrow, but have started on the lh side of the butt now, rh side is ready to be sanded in various grades of paper, but will leave that until both sides are ready.
At this rate I'll be inletting it by next weekend! |
|
|
NZAFTA President
1st place HP springer - 2014 WFTF Worlds 1st place HP springer - 2014 Nats AA TX200 MK111, Optisan Viper 8-32x60 JSB. VMach, TbT, maestro design. |
|
|
|
|
(pink)MIST
Forum Moderator
Joined: 10 Mar 2013 Location: Hamilton Status: Offline Posts: 465 |
Post Options
Thanks(0)
Quote Reply
Posted: 20 Apr 2014 at 4:14pm |
|
last night saw the trigger hole get cut through, the tx blade should sit about 1-1.5mm off the base of the now to be trigger guard
  with the trigger hole cut, i could focus on getting the right amount of room in front of the grip for a natural hold, so a bit of time was spent in that area with 80-150 grit paper Id already marked a centreline down the top of the stock, which i use to help shape the lh side of the butt to bring my eye into alignment with the centreof the bore,all things going to plan that should be the line the scope sits on, so half the work of aligning the scope to the eye is done. 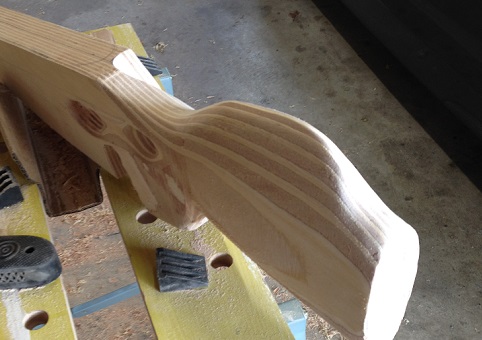 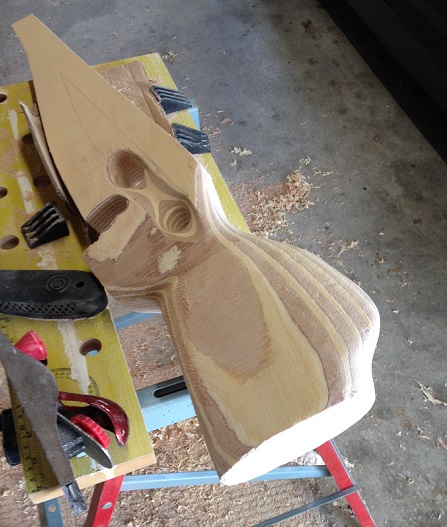 a fair bit of time spent roughing this into shape using a block plane, anda half round rasp. once it was roughed into this shape, i fitted a flap wheel to the drill, and gradually worked it more to what i wanted,including the bottom of the fore-end, which saw the use of the plane, half round rasp,some drum sanding attatchments, and finally rough sanding with 80grit. I,ll leave this now for a day or so, in a cabinet with a dehumidifier going, just to make sure its not getting moisture in the timber 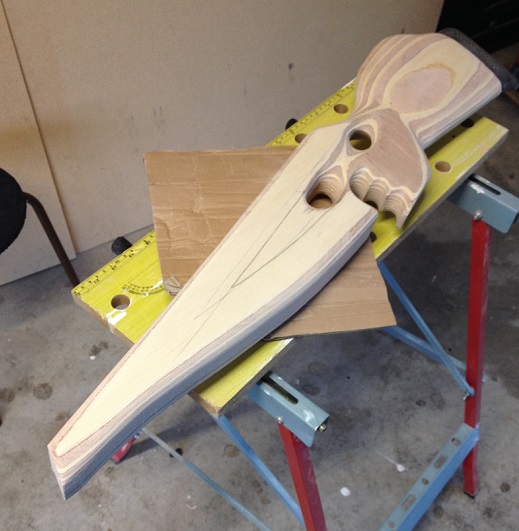 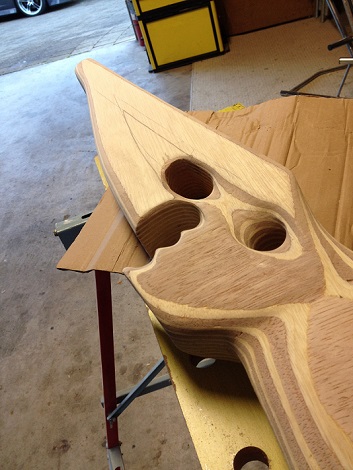 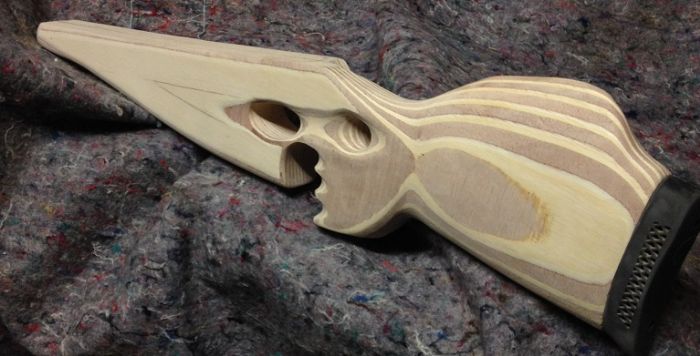 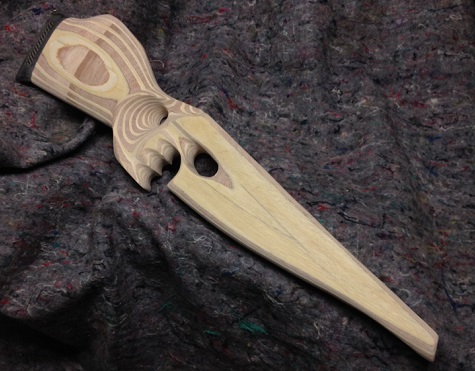 |
|
|
NZAFTA President
1st place HP springer - 2014 WFTF Worlds 1st place HP springer - 2014 Nats AA TX200 MK111, Optisan Viper 8-32x60 JSB. VMach, TbT, maestro design. |
|
|
|
|
(pink)MIST
Forum Moderator
Joined: 10 Mar 2013 Location: Hamilton Status: Offline Posts: 465 |
Post Options
Thanks(0)
Quote Reply
Posted: 25 Apr 2014 at 5:08pm |
|
Ok bit of an update on this, getting minimal time this week but still making forward progress.
Started on the inletting, most people building a stock do this first as it's a lot easier, I do it closer to finished so I can line the action up where I want it (one of the issues with a generic stock for me is to line the action and scope up to me, I've got to hold it off square, uncomfortable by the slightest amount, so why not angle the action in the stock to suit myself?) About 2 hours into it, and about 80% done. Note to anyone doing this is (a) take your time setting up router with the guide, work on the opposite side to where the guide is as this stops the router "running off" out the side if your stock. And note (b) either remove or cover anything in the garage/work area you don't want covered in dust and shavings :) Tomorrow's job will be cleaning the 2 Holden's :) Will get progress pics up tomorrow |
|
|
NZAFTA President
1st place HP springer - 2014 WFTF Worlds 1st place HP springer - 2014 Nats AA TX200 MK111, Optisan Viper 8-32x60 JSB. VMach, TbT, maestro design. |
|
|
|
|
nunga
Admin 

Joined: 09 Mar 2013 Location: Pukekohe Status: Offline Posts: 1125 |
Post Options
Thanks(0)
Quote Reply
Posted: 26 Apr 2014 at 2:24am |
they are only Holden's mate dont worry! ops thats right you are picking me up on Sunday... i ment yea clean them bro nice cars! |
|
|
|
|
(pink)MIST
Forum Moderator
Joined: 10 Mar 2013 Location: Hamilton Status: Offline Posts: 465 |
Post Options
Thanks(0)
Quote Reply
Posted: 27 Apr 2014 at 6:51am |
|
cleaned the cars ,you better not get mud in or on them :)
heres some pics from inletting the stock 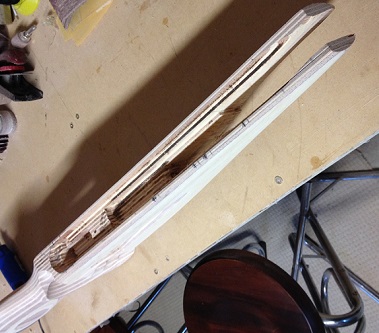 Transfered the measurement across from the tx, and marked the lines. Started in the midlle, doing the deepest cuts first and working my way outwards. First cuts are done with a straight blade cutter in a plunge router, taking about 3-5mm in depth each pass. 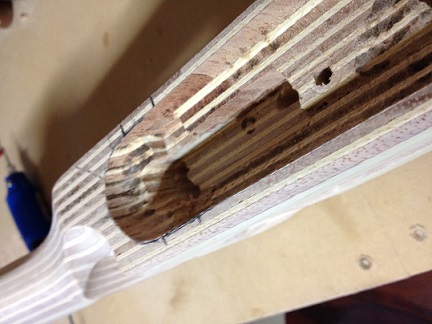 Next lot of cuts was done with a 15mm round cutter,this helps to get the cylindrical shape for the action to bed against. 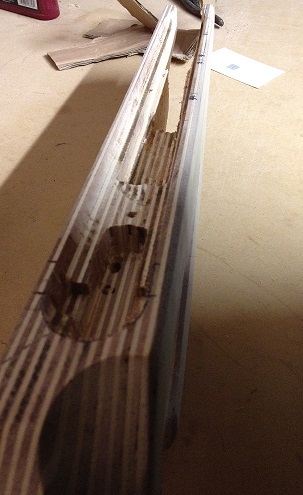 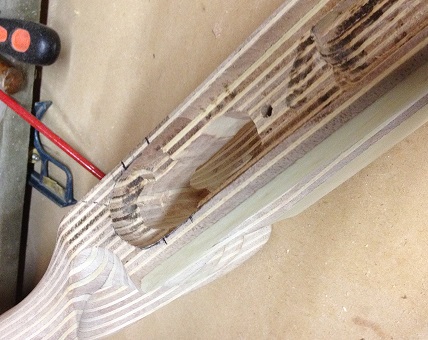 back to the straight blade,to cut down for the trigger well 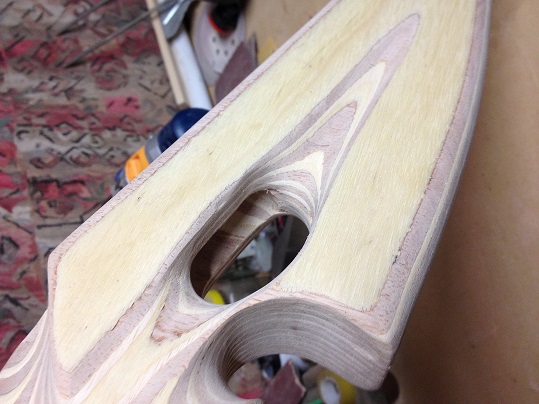 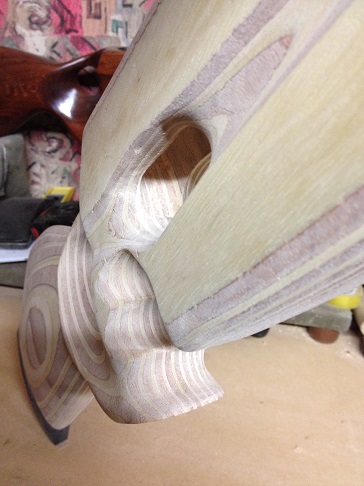 and to cut the underside of the forend for the underlever cocking arm to move through 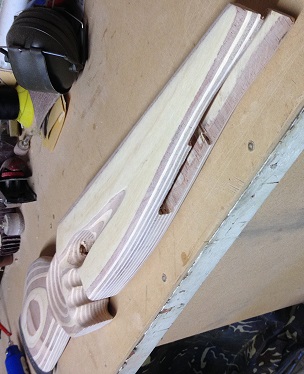 Thats inletting made to look easy :) Whole lot (incl inletting) has taken approx 6hours so far,now i'll get in there with 320grit paper and make it look nice, theres another 2 hours easy Edited by (pink)MIST - 29 Apr 2014 at 8:40am |
|
|
NZAFTA President
1st place HP springer - 2014 WFTF Worlds 1st place HP springer - 2014 Nats AA TX200 MK111, Optisan Viper 8-32x60 JSB. VMach, TbT, maestro design. |
|
|
|
|
mmamonster
Groupie 

Joined: 31 Oct 2013 Location: Staffordshire Status: Offline Posts: 46 |
Post Options
Thanks(0)
Quote Reply
Posted: 29 Apr 2014 at 3:38am |
|
Nice work.
|
|
|
killing is as easy as breathing
|
|
|
|
|
(pink)MIST
Forum Moderator
Joined: 10 Mar 2013 Location: Hamilton Status: Offline Posts: 465 |
Post Options
Thanks(0)
Quote Reply
Posted: 29 Apr 2014 at 8:44am |
|
Thanks mmamonster, but it's gonna look better soon :)
Tonight has workshop time pencilled in, and it's about 1 1/2 hours away from the first test fit :) Once test fitting starts it's generally inside a week till it's all together finally, so fingers crossed tonight goes well :) |
|
|
NZAFTA President
1st place HP springer - 2014 WFTF Worlds 1st place HP springer - 2014 Nats AA TX200 MK111, Optisan Viper 8-32x60 JSB. VMach, TbT, maestro design. |
|
|
|
|
Pauly5
Forum Moderator
Joined: 11 Mar 2013 Location: Titahi Bay Status: Offline Posts: 1746 |
Post Options
Thanks(0)
Quote Reply
Posted: 30 Apr 2014 at 3:14pm |
|
Just had a good look at the thread, and that looks great! I must admit my first thoughts went out to the Holdens.
 How will the weight of the ply stock compare to the original stock? What grade of ply did you use? |
|
|
|
|
(pink)MIST
Forum Moderator
Joined: 10 Mar 2013 Location: Hamilton Status: Offline Posts: 465 |
Post Options
Thanks(0)
Quote Reply
Posted: 30 Apr 2014 at 4:15pm |
|
Slightly heavier than the original, but only by 5-600 grams.
Marine grade pine, and marine grade rimu alternated , with a total cost of $24 incl aliphatic resin to glue it all up :) |
|
|
NZAFTA President
1st place HP springer - 2014 WFTF Worlds 1st place HP springer - 2014 Nats AA TX200 MK111, Optisan Viper 8-32x60 JSB. VMach, TbT, maestro design. |
|
|
|
|
(pink)MIST
Forum Moderator
Joined: 10 Mar 2013 Location: Hamilton Status: Offline Posts: 465 |
Post Options
Thanks(0)
Quote Reply
Posted: 02 May 2014 at 6:15pm |
|
got the inletting as close as I wanted to go with a router, so it was test fit time, gotta say, for a test fit to see how much i needed to sand it out, im pretty happy:)
 2 more cuts to make, the recess for the breech loading area, and the recess for the cocking lever release, 10mins tops. First marked it out, then used the router to clear the bulk of it, followed by the dremel for the last tidy up. A final depth check revealed I needed 3.8mm more cleared out through the inlet, so using the half round bit and with the plunge depth set, the router cleared out the last of the excess wood. Sat the action back in, looking good, marked and drilled the front stock screw holes,countersunk them and checked for alignment. Still all good, phew, wouldnt want to be this far in and f%$k it up :) Put the action back in again (i really enjoy this , half a mm at a time with the 120grit paper and recheck..... ) now its within 0.25 of a mm so im going to stop sanding , the main stock bolt will have plenty of pull to settle it down the last bit. final test fit for the night, heres the pics.      now comes the easy bit, lots of sanding by hand, through various grades of paper, down to 320 grit, but once thats done itll get the colour put on, and the 2pot clear coat :) more pics to follow after a few hours of sanding
|
|
|
NZAFTA President
1st place HP springer - 2014 WFTF Worlds 1st place HP springer - 2014 Nats AA TX200 MK111, Optisan Viper 8-32x60 JSB. VMach, TbT, maestro design. |
|
|
|
|
(pink)MIST
Forum Moderator
Joined: 10 Mar 2013 Location: Hamilton Status: Offline Posts: 465 |
Post Options
Thanks(0)
Quote Reply
Posted: 04 May 2014 at 2:50pm |
|
while all the sanding is going on, ive also got to make its twin, with an FWB sport 124 mounted inside it for a wellington shooter. This will be used in their PRO650 class, which is limited in scope power, and build cost (sometimes its who you know :) )
heres todays hour and 1/2, the bulk of the inletting. altogether at the start, beautiful rifle , sub 12ft/lbs and very accurate with little recoil  Action out  Inletting and trigger hole marked   Plunge Router makes inletting easy and quick    More people should have a go at this, its alot easier than youd think, as long as you actually think about it first. Easy to take wood away , not so easy to put it back :) |
|
|
NZAFTA President
1st place HP springer - 2014 WFTF Worlds 1st place HP springer - 2014 Nats AA TX200 MK111, Optisan Viper 8-32x60 JSB. VMach, TbT, maestro design. |
|
|
|
|
SteveH
Member 

Joined: 10 Mar 2013 Location: Auckland Status: Offline Posts: 25 |
Post Options
Thanks(0)
Quote Reply
Posted: 06 May 2014 at 1:33pm |
|
They are looking pretty awesome, now if I just had all the tools and a garage to work in...
|
|
|
HARC President 2014/5
|
|
|
|
|
(pink)MIST
Forum Moderator
Joined: 10 Mar 2013 Location: Hamilton Status: Offline Posts: 465 |
Post Options
Thanks(0)
Quote Reply
Posted: 06 May 2014 at 2:12pm |
|
Hi Steve
Tools aren't hat to come by, and the first few I did (was living somewhere else) I did sitting in the deck with a couple beers every night. It was almost easier doing that as there was no garage to clean up :) |
|
|
NZAFTA President
1st place HP springer - 2014 WFTF Worlds 1st place HP springer - 2014 Nats AA TX200 MK111, Optisan Viper 8-32x60 JSB. VMach, TbT, maestro design. |
|
|
|
|
Post Reply
|
Page 123 8> |
 Tweet
Tweet
|
| Forum Jump | Forum Permissions You cannot post new topics in this forum You cannot reply to topics in this forum You cannot delete your posts in this forum You cannot edit your posts in this forum You cannot create polls in this forum You cannot vote in polls in this forum |


 Topic Options
MIST") (pink)MIST wrote:
(pink)MIST wrote: