My DIY pellet trap |
Post Reply 
|
Page 123> |
| Author | |
JasonEdward 
Senior Member 
Joined: 22 Sep 2024 Location: Waihi Status: Offline Posts: 152 |
 Post Options Post Options
") Thanks(0) Thanks(0)
 Quote Reply Quote Reply
 Topic: My DIY pellet trap Topic: My DIY pellet trapPosted: 24 Sep 2024 at 5:28pm |
|
Excellent. I'm a newby here but it's good to see we have some with some great design and engineering skills.
It used to be so easy with low powered air rifles but I've had to stop and think with higher power it's surprising some very cheap light but surfaced chip board will send pellets straight back at my son and i 14 m from our targets. I need to put together a safer set up so thanks for the great ideas - those mouse traps are a stroke of genius! 
|
|
 |
|
|
RangerPete
Senior Member
Joined: 19 Apr 2023 Location: Cambridge. Status: Offline Posts: 978 |
Post Options
Thanks(0)
Quote Reply
Posted: 20 Feb 2024 at 4:53am |
|
Nice work Kiwi.
I like that it is wall mountable 👍🏻 |
|
|
Walk quietly, but carry a big stick.
|
|
|
|
|
kruzaroad
Senior Member

Joined: 03 Jul 2022 Location: Hastings 4 now Status: Offline Posts: 2492 |
Post Options
Thanks(0)
Quote Reply
Posted: 13 Feb 2024 at 6:14am |
|
Excellent build review.
Nicely done. |
|
|
|
|
KiwiTR6
Senior Member
Joined: 04 Nov 2022 Location: Stratford Status: Offline Posts: 347 |
Post Options
Thanks(0)
Quote Reply
Posted: 12 Feb 2024 at 5:32pm |
|
OK, here are the construction details of my trap as promised (apologies for the very average draughting work).  Materials List (a lot of this I had laying around the shed) 100x25 sawn pine 12mm plywood 3.0mm aluminium checker plate C/sunk wood screws Panduit DS5 duct sealing compound - 2 x 5lb blocks (purchased from Element14 for around $50 each with free freight) Kevlar sheet (purchased from Aliexpress for around $50 delivered) The box was constructed from pine sides with ply front and rear panels. There is a large cutout in the front panel and two small holes in the top of the rear panel to enable me to hang it on the wall. All of this was screwed together with c/sunk screws, the front panel then being removed for the next step.   The next moves were to cut a couple of scrap pieces of checker plate to size and fasten them in place with tacks placed around the perimeter and then to open the two boxes of duct sealant and split them along their length. The four pieces were then laid onto the alloy and firmly pressed down into place working the edges to flatten the material as best I could. The stuff is very tacky so bonds strongly to the alloy.  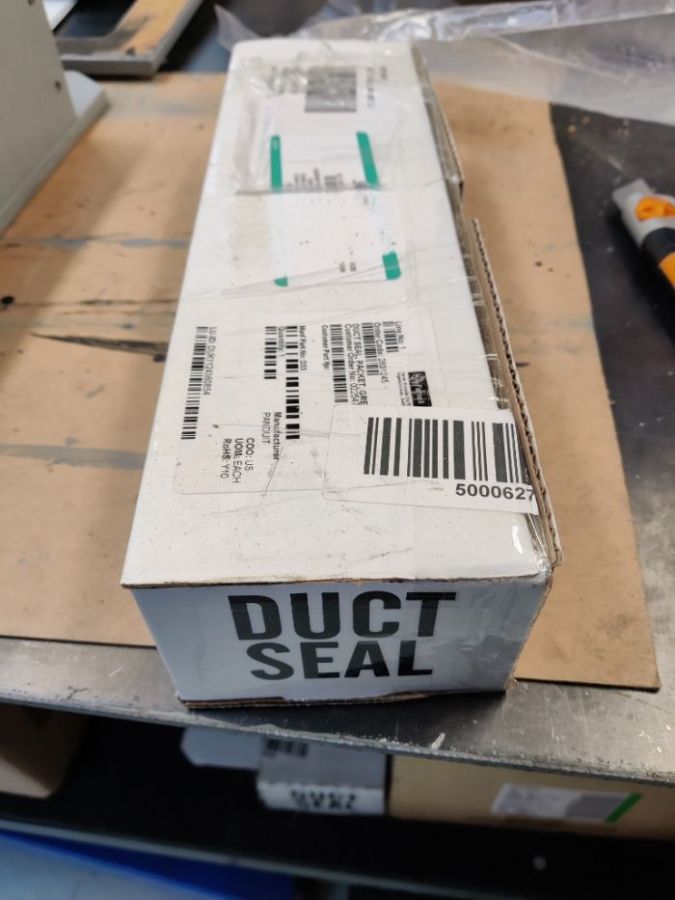 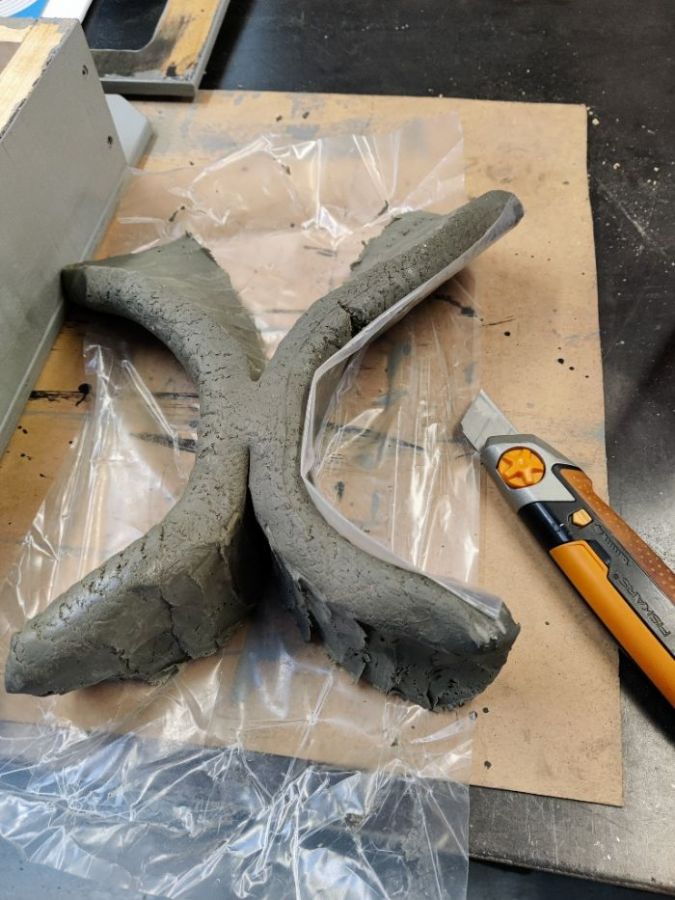 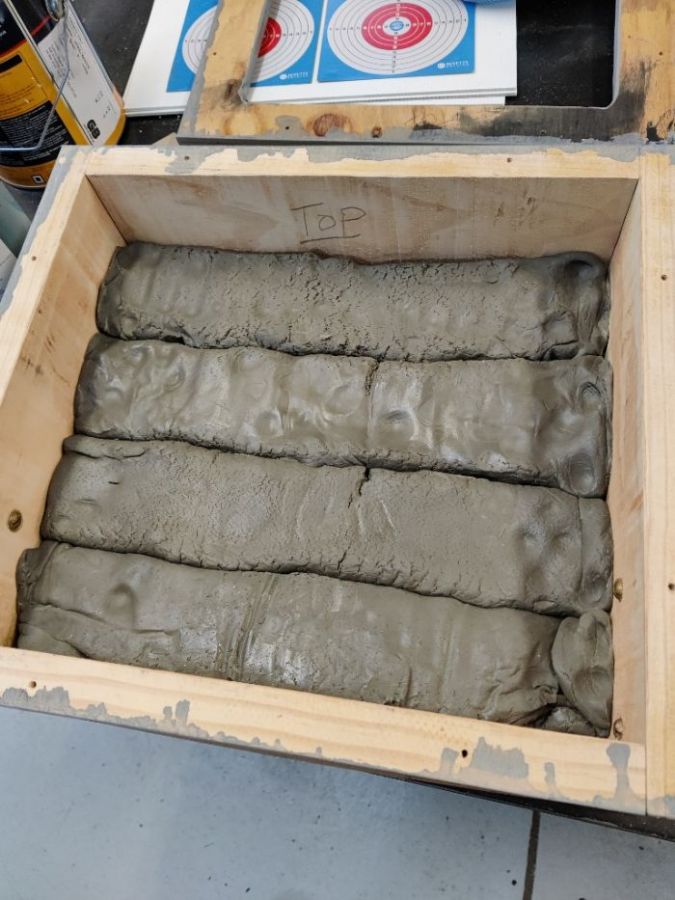 The final layer is Kevlar (aramid fibre) sheet. I thought I'd ordered woven fabric but upon arrival I found that it was mono-directional supported on a plastic backing sheet. This resulted in some discussion with the supplier and a refund, so I don't have the direct link. However, I decided to use it anyway and folded the sheet into multiple layers which I then used the wife's sewing machine to secure together. This has actually worked very well so in good conscience I ended up contacting the store and paying them back. From memory the sheet was 0.5 x 2.0m, so I ended up with about 6 layers. Initially I tried stapling it to the timber sides, but the staples just bent over, they couldn't puncture it. So a few more tacks were used to keep it in place. 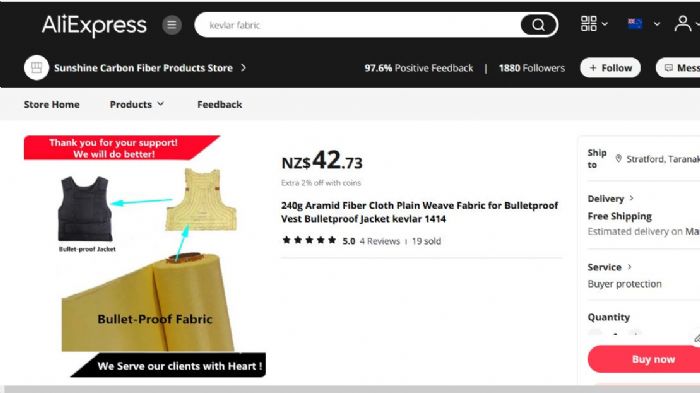 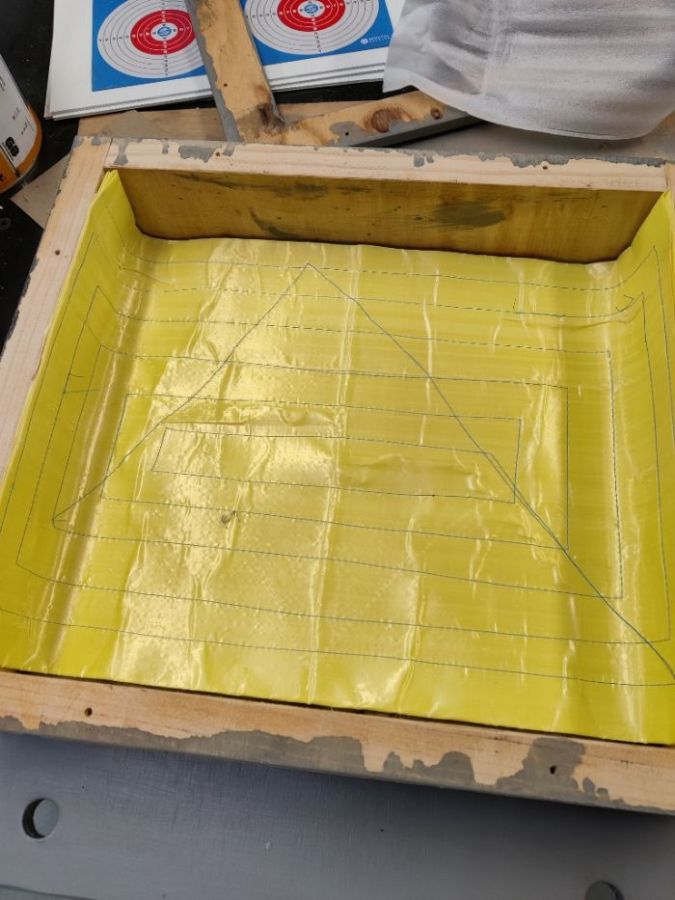 After this the front panel was refitted a bottom slot mount for the Coreflute target backing to sit in was fabricated from a couple of pieces of thin timber and a couple of mouse trap mechanisms were repurposed at each top corner. In hindsight a single trap at the top centre position would be quite adequate and probably easier to use. 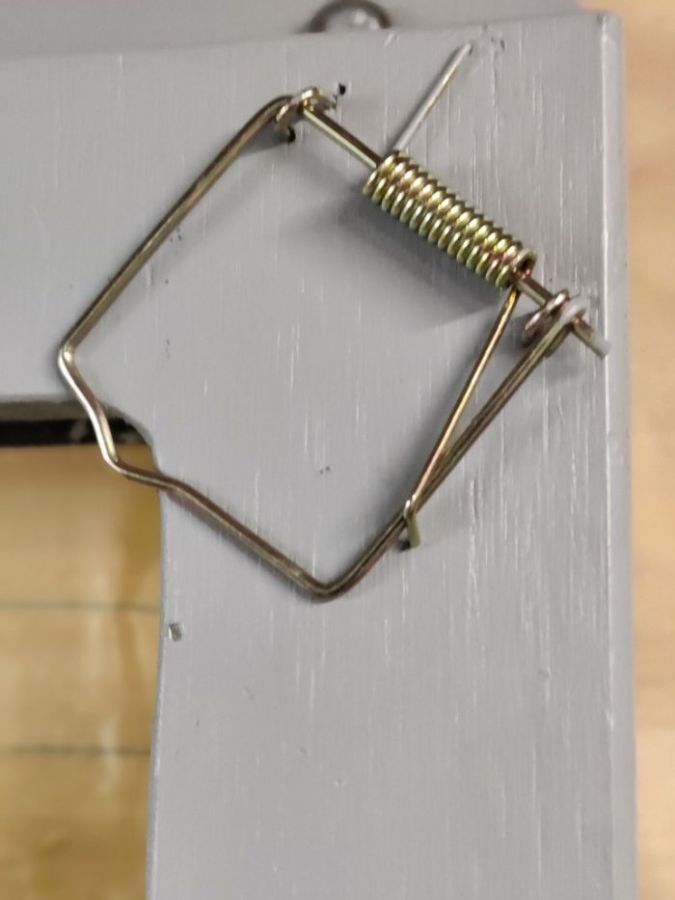 While I was at it I made up a couple of pivoting side plates that I can secure to some bolts on each side so the trap can be used free-standing with adjustment if the surface isn't level. I haven't bothered with dimensions for these as they're not really necessary but can be easily made using the images below as a guide. I actually fitted the bolts for these before I installed the duct sealant. 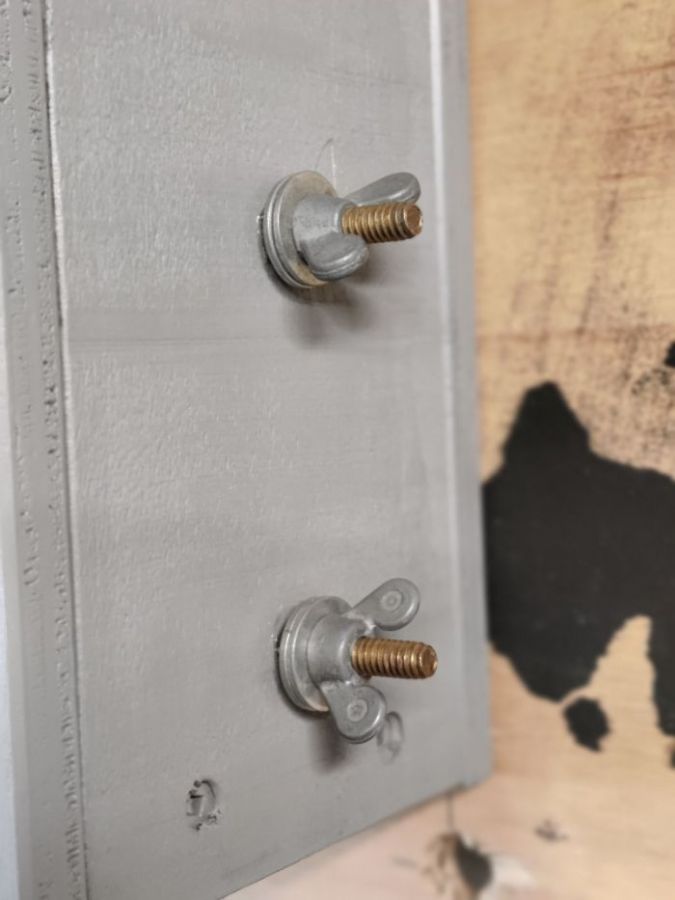 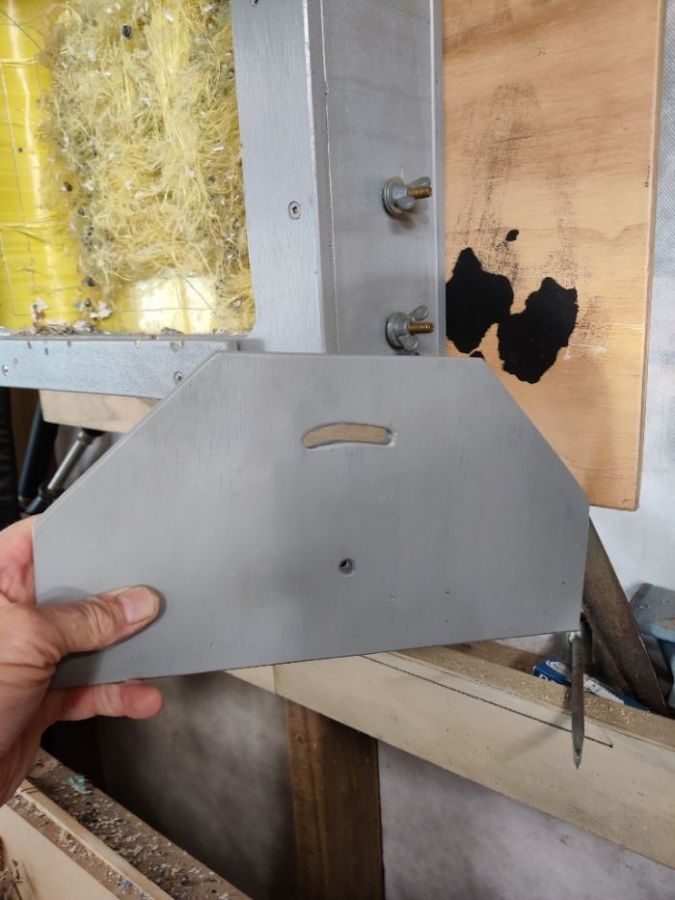 The whole lot was then painted with a couple of coats of my favourite PA10 paint (grey on this occasion) and it was ready for use  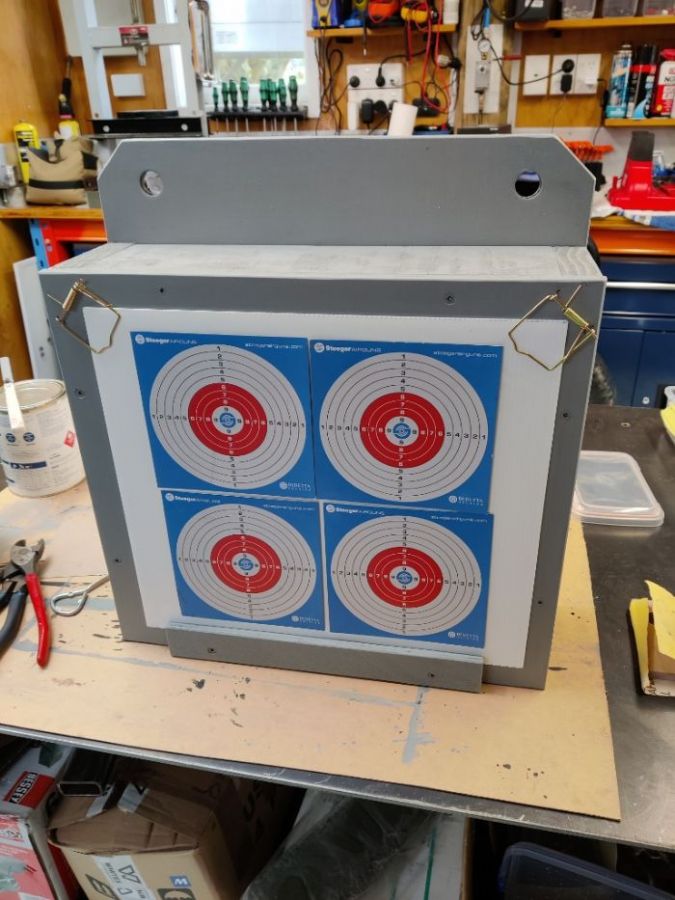 I currently have it mounted on the wall of my car shed and it's performed very well so far, a huge advance on the rag-filled cardboard box that preceded it! However, with 10lb of sealant it's no lightweight to lift into position or move. Overall, it was certainly worth the effort and the cost of the materials that I had to buy in to make it. Hopefully others might feel the same and build something similar for themselves. Edited by KiwiTR6 - 12 Feb 2024 at 5:35pm |
|
|
FX King 600 .22
FX Dreamline Classic .22 Diana Outlaw .22 Air Arms S410 .22 Cometa Fenix 400 .177 Weihrauch HW50 .177 Crosman 2240 Custom .22 Crosman 2250 Custom .22 Brocock Grand Prix .22 |
|
|
|
|
Declan
Senior Member

Joined: 26 Nov 2020 Location: North Island Status: Offline Posts: 86 |
Post Options
Thanks(0)
Quote Reply
Posted: 08 Feb 2024 at 7:34am |
|
I thought your use of mouse traps was very clever. I’ve purchased some to use on my target board. So cheap at only $1.65 for two. Thanks for sharing.
|
|
|
|
|
kruzaroad
Senior Member
Joined: 03 Jul 2022 Location: Hastings 4 now Status: Offline Posts: 2492 |
Post Options
Thanks(0)
Quote Reply
Posted: 04 Feb 2024 at 9:51am |
|
Bloody ell, you'd have to fair force a second pellet in to double load.
I have gone to twice on 1322 as the extended probe pushes far enough not to be able to see it. Both times the extra loadong force on the bolt alerted me to it. Having the bolt retain the pressure of a mag is rediculous! It just creates a wear point at the same places in the plastic mag and will be pushing the bolt to one side. Time for me to look into mags I think. |
|
|
|
|
Pauly5
Forum Moderator 
Joined: 11 Mar 2013 Location: Titahi Bay Status: Offline Posts: 1564 |
Post Options
Thanks(0)
Quote Reply
Posted: 04 Feb 2024 at 9:05am |
The probe stops mag from rotating. Then as the bolt is drawn back the spring is allowed to rotate the next pellet into place. This is the point skirt damage can occur as it is the pellet that stops the barrel in the mag from rotating further. These kind of spring loaded mags are common. Benjamin Marauder style, FX to name a couple. Air Arms and earlier FX, Weihrauch etc have a system where a small lever rotates the mag into place, and so no damage occurs. Tghen there are spring loaded ones like Brocock that don't damage the pellets because they have a locating mechanism to stop the pellet in the right position. Most of these can still be double loaded. Pretty sure Weihrauch have an anti double load mechanism though. I'm talking the HW100 series of Weihrauch,
|
|
|
|
|
KiwiTR6
Senior Member
Joined: 04 Nov 2022 Location: Stratford Status: Offline Posts: 347 |
Post Options
Thanks(0)
Quote Reply
Posted: 04 Feb 2024 at 8:20am |
|
It's a pretty cool gun but now relegated to a future project as it was faulty when I bought it off Gun City. It's got plenty of power (reputedly 60ftlb) but the mag stopped rotating soon after I got it. The push lever was well worn and I've played around with it but still needs more work. It's also started leaking air between the cylinder and the breach as my makeshift seal hasn't worked so it blows air back into your eye
 |
|
|
FX King 600 .22
FX Dreamline Classic .22 Diana Outlaw .22 Air Arms S410 .22 Cometa Fenix 400 .177 Weihrauch HW50 .177 Crosman 2240 Custom .22 Crosman 2250 Custom .22 Brocock Grand Prix .22 |
|
|
|
|
kruzaroad
Senior Member
Joined: 03 Jul 2022 Location: Hastings 4 now Status: Offline Posts: 2492 |
Post Options
Thanks(0)
Quote Reply
Posted: 02 Feb 2024 at 3:24pm |
|
What's your view of it.
Do pellets ever jam? Do think you lose much power from the air leakage. Just watched a Video on one. Should do a review looks like an interesting set up. |
|
|
|
|
KiwiTR6
Senior Member
Joined: 04 Nov 2022 Location: Stratford Status: Offline Posts: 347 |
Post Options
Thanks(0)
Quote Reply
Posted: 02 Feb 2024 at 8:15am |
|
My Evanix AR6 has a rotary mag just like a revolver. Pressurised air pushes the pellet out of the mag and through the barrel with some minor leakage from each face of the mag where it fits into the breach. The mag rotates to the next chamber when the hammer is cocked (if all works as it should!). Part #3 in the parts diagram below. 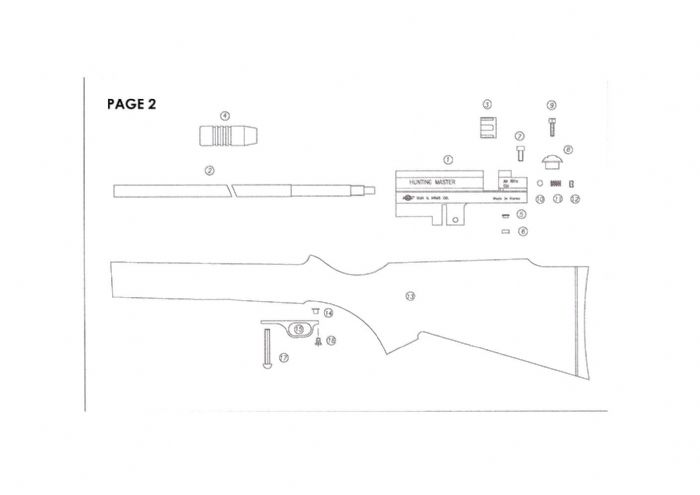 |
|
|
FX King 600 .22
FX Dreamline Classic .22 Diana Outlaw .22 Air Arms S410 .22 Cometa Fenix 400 .177 Weihrauch HW50 .177 Crosman 2240 Custom .22 Crosman 2250 Custom .22 Brocock Grand Prix .22 |
|
|
|
|
Post Reply
|
Page 123> |
 Tweet
Tweet
|
| Forum Jump | Forum Permissions You cannot post new topics in this forum You cannot reply to topics in this forum You cannot delete your posts in this forum You cannot edit your posts in this forum You cannot create polls in this forum You cannot vote in polls in this forum |


 Topic Options
 kruzaroad wrote: