Valve mod - pcp pistol |
Post Reply 
|
Page <12345 6> |
| Author | |
kruzaroad 
Senior Member 

Joined: 03 Jul 2022 Location: Hastings 4 now Status: Offline Posts: 3023 |
 Post Options Post Options
") Thanks(0) Thanks(0)
 Quote Reply Quote Reply
 Posted: 23 Sep 2024 at 6:16am Posted: 23 Sep 2024 at 6:16am |
|
It has quite a high polish to it.
Think you have to be careful with the pics, one thing I've noticed is they tend to make very miniscule grooves look huge. You can't always believe a pic. |
|
 |
|
|
Pauly5
Forum Moderator 
Joined: 11 Mar 2013 Location: Titahi Bay Status: Online Posts: 1747 |
Post Options
Thanks(0)
Quote Reply
Posted: 28 Oct 2024 at 6:56am |
|
I had a good stint in the garage this weekend and have made good and steady progress on this build. I have found that accomplishing one section, then have a cleanup, small break, then onto the next is working well for me. It helps me clear my head for the next part. Not to mention making my wife a coffee and a quick chat too.
 So I got the barrel fitted then milled out the loading breech. then drilled and tapped two retaining grub screws for the barrel. Next I chamfered the corners on the top. I'm not totally sure what I am going to do here, but have been toying with keeping it with clean lines and mount a small red dot. I could also fasten a weaver rail to it The result emerged from the aluminium mess.` 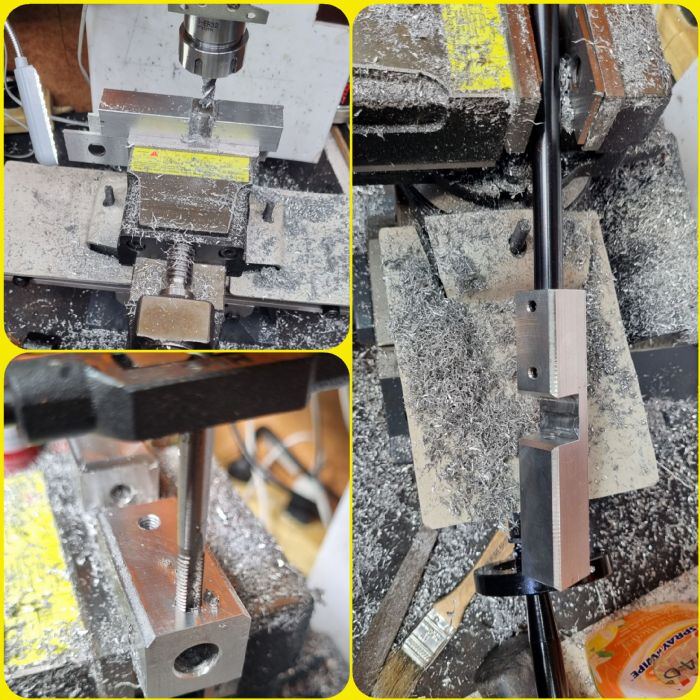 Now that the barrel is fitted I was able to start on the bolt. This turned out really well and confirmed that the barrel and bolt are nicely lined up.Alu had an 8.5mm bore and I reduced the stainless bolt to 8.3 mm at the back and 6.03 mm for the probe part and it slide into place beautifully, so I am very pleased with that. 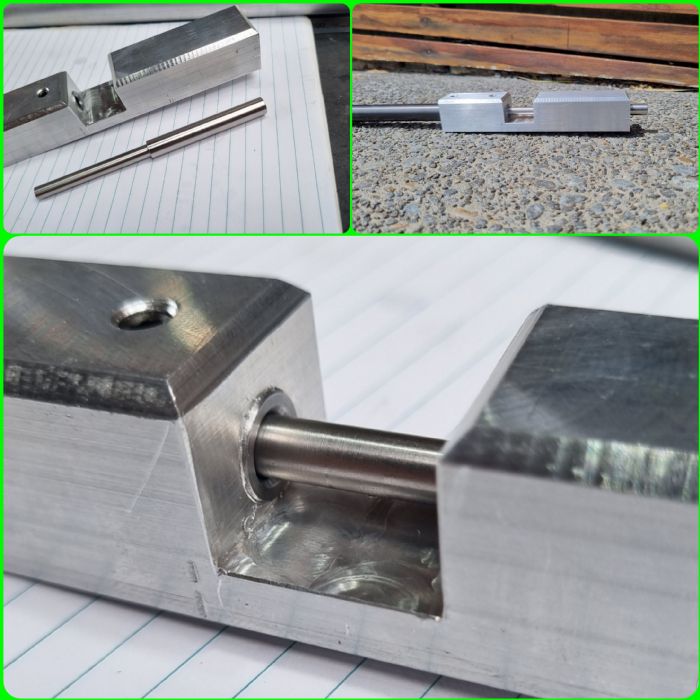 I had also made a preliminary mockup for a fill valve to include a gauge. This is not the final piece, but I know what I want to do. Gauge is mounted into a boss that I plan to have a barrel support fitted to. Fill probe fits nicely underneath it. I just need to get a 10mm x 1.0mm thread tap for the gauge. Also see the finished firing valve body, poppet and seat. They came up really well and I am excitied to see how well it works. Looks good for now anyway. Note the custom Nunga forged brass wrapped in my hori custom made spring.  |
|
|
|
|
RangerPete
Senior Member
Joined: 19 Apr 2023 Location: Cambridge. Status: Offline Posts: 1105 |
Post Options
Thanks(0)
Quote Reply
Posted: 28 Oct 2024 at 8:32am |
|
Thats all looking really smart Pauly. Amazing stuff you'r doing there!
Im very keen to see how it is all going to come together 
|
|
|
Walk quietly, but carry a big stick.
|
|
|
|
|
Pauly5
Forum Moderator
Joined: 11 Mar 2013 Location: Titahi Bay Status: Online Posts: 1747 |
Post Options
Thanks(0)
Quote Reply
Posted: 29 Oct 2024 at 3:09am |
|
Next I contoured the base of the breech to fit onto the 32mm tank. I used a combo of flat end mill and a 32mm wood bit.
Unfortunately the wood bit isn't an exact shape with a flat spot making the resulting cut a bit like a flattened dome, so I cut a chanel out with the end mill so there's good contact. I will use a bit of fine sandpaper on a tube to take the sharp edges off the cut later. So you can see what look like corrugations in the cut face. This is probably from my small mill picking up vibrations, but for this purpose it's fine and the light makes it look worse than what it is. 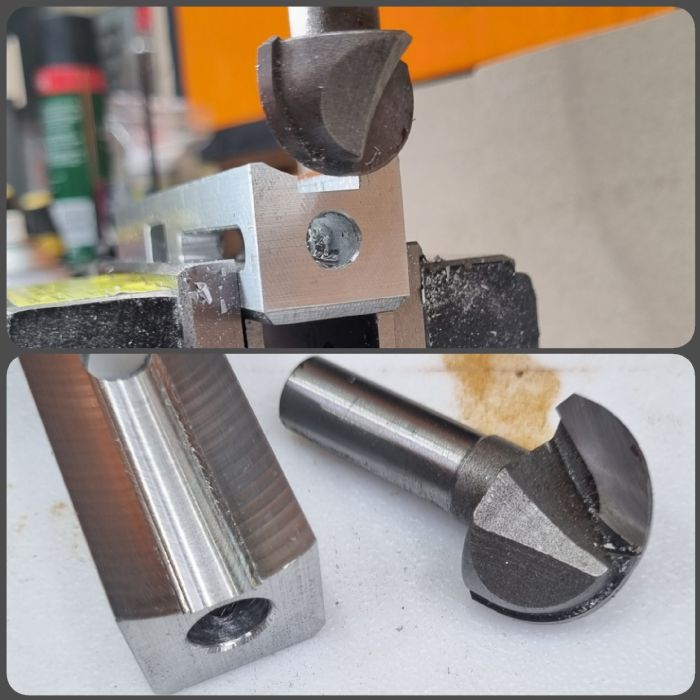 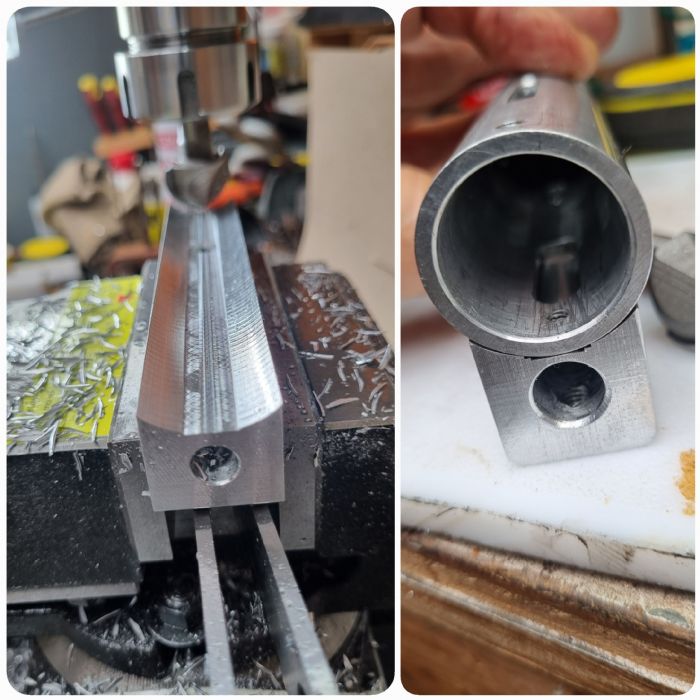 |
|
|
|
|
Pauly5
Forum Moderator
Joined: 11 Mar 2013 Location: Titahi Bay Status: Online Posts: 1747 |
Post Options
Thanks(0)
Quote Reply
Posted: 19 Nov 2024 at 12:04pm |
|
I got myself a proper drill and tap set. Amazing what a difference it makes having the correct drill size, especially when tapping stainless. 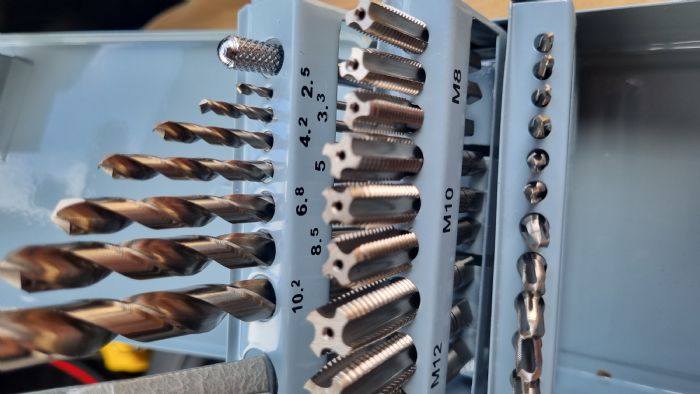
|
|
|
|
|
Pauly5
Forum Moderator
Joined: 11 Mar 2013 Location: Titahi Bay Status: Online Posts: 1747 |
Post Options
Thanks(0)
Quote Reply
Posted: 19 Nov 2024 at 4:49pm |
|
So having said that I have made some more progress on this build.
I remade a new fill valve with protection for the gauge. The fill valve is a simple but effective system. I milled off some threads from the screw to let air past and the O ring stops it getting out. 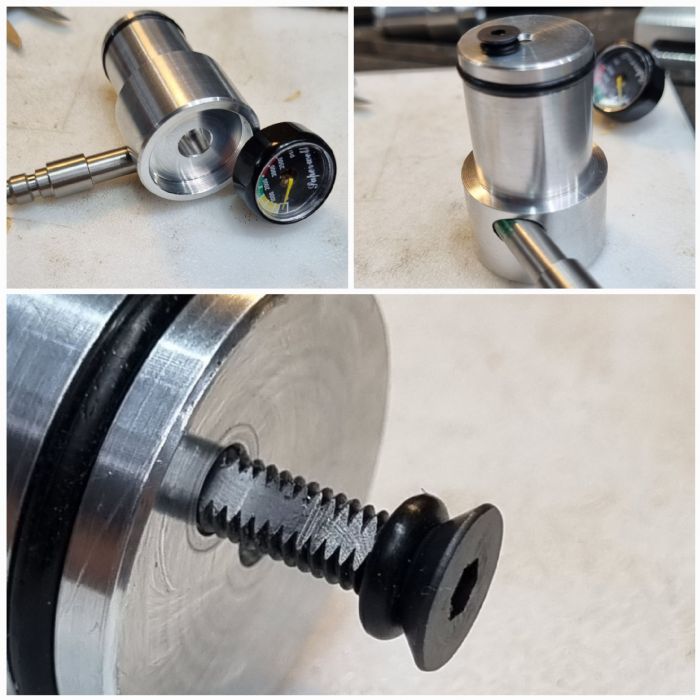 Breech has been drilled and holes tapped to secure it to the tank/body. 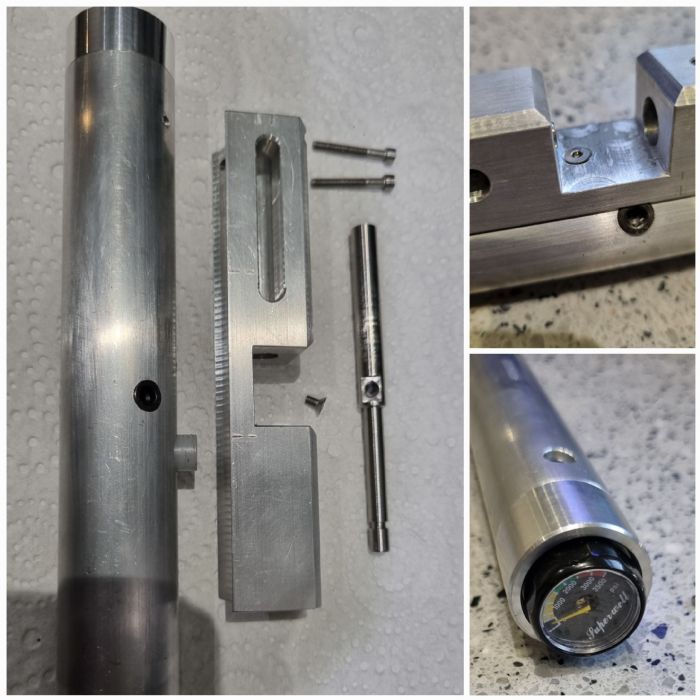 Cap screws sized and retaining holes drilled, tapped and counter bored for them to hold in the fill and main valve body. Basically I took off the knurling so there was an exact fit. 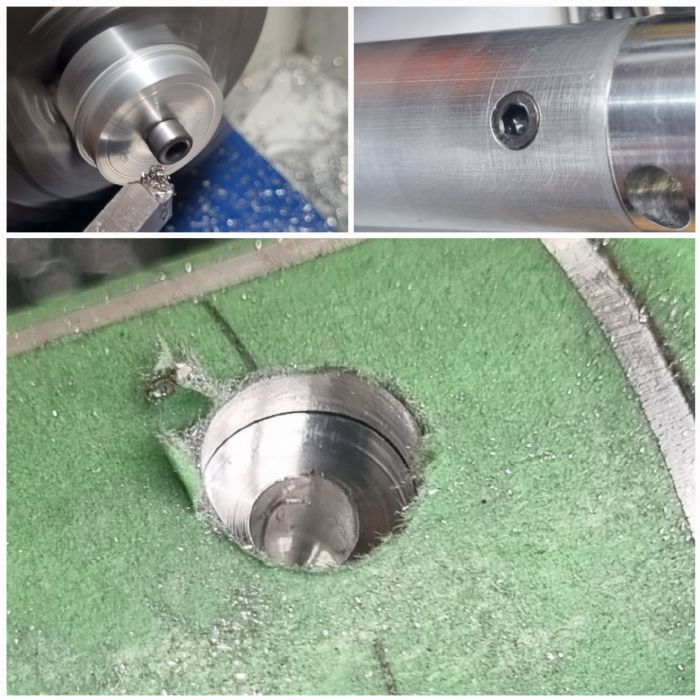 |
|
|
|
|
Pauly5
Forum Moderator
Joined: 11 Mar 2013 Location: Titahi Bay Status: Online Posts: 1747 |
Post Options
Thanks(0)
Quote Reply
Posted: 19 Nov 2024 at 4:59pm |
|
Here you see the stainless probe being tapped. I learnt that with the harder material you need the correct drill bit size. A std drill set has a 4mm drill bit, but it is most likely 3.9 mm, but a 4.2 mm drill bit is required for an M 5 tap. How many taps did I break learning this? New tap set has 3 taps per size. Tapered, intermediate and bottoming. So you need to run all three through to get the final size hole. Fortunately I am enjoying all this learning. The bolt handle will be a straight pull, being retained by a sprung clip. This way you can also close the bolt by the handle, or by pushing bolt with your thumb. Bolt just temporary for now. 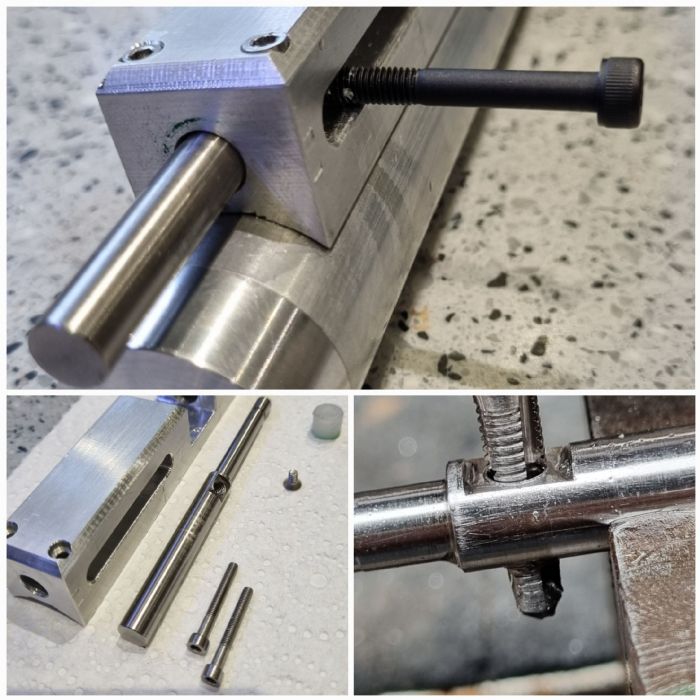 |
|
|
|
|
jwabfrog
Senior Member

Joined: 13 Nov 2021 Location: Thames Status: Offline Posts: 175 |
Post Options
Thanks(0)
Quote Reply
Posted: 20 Nov 2024 at 2:39am |
|
Awesome Pauly, I am learning vicariously. It will be super satisfying to shoot knowing you've made the entire thing!
|
|
|
|
|
Pauly5
Forum Moderator
Joined: 11 Mar 2013 Location: Titahi Bay Status: Online Posts: 1747 |
Post Options
Thanks(0)
Quote Reply
Posted: 20 Nov 2024 at 2:58am |
|
That's what is motivating me. I mull over something for a few days then go and make it.
I plan to feature a bit of nice wood on this too. I have some walnut for it. This is a mockup with a grip I had made ages ago, but I don't really like it. I will put some wood under the tank too. That should hide the industrialousness look of the tank. Excuse the mess. 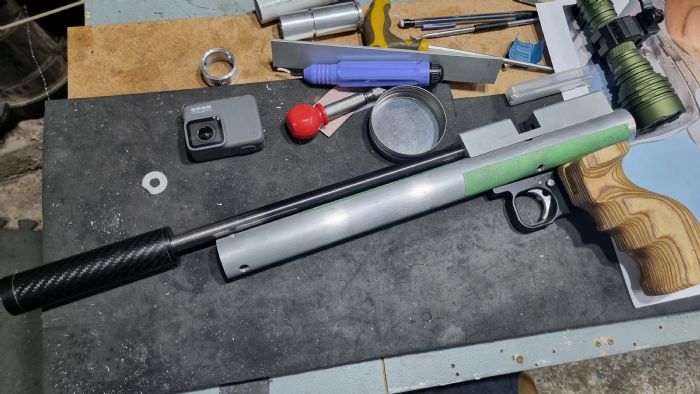 |
|
|
|
|
J-S
Senior Member
Joined: 20 Oct 2014 Location: Auckland Status: Offline Posts: 510 |
Post Options
Thanks(0)
Quote Reply
Posted: 20 Nov 2024 at 4:09am |
|
Looks f@#king cool. wish i had the skills!
|
|
|
J S Airguns
Air Arms TX200('s) Theoben Sirocco HW77 FWB 300s Webley Patriot One or two others... Current projects: Too many.. |
|
|
|
|
RangerPete
Senior Member
Joined: 19 Apr 2023 Location: Cambridge. Status: Offline Posts: 1105 |
Post Options
Thanks(0)
Quote Reply
Posted: 20 Nov 2024 at 11:48am |
|
Thats really good Pauly
|
|
|
Walk quietly, but carry a big stick.
|
|
|
|
|
nunga
Admin 

Joined: 09 Mar 2013 Location: Pukekohe Status: Offline Posts: 1125 |
Post Options
Thanks(0)
Quote Reply
Posted: 26 Nov 2024 at 9:37am |
|
2nd place HP springer - WFTF World Championships 2014
|
|
|
|
|
Pauly5
Forum Moderator
Joined: 11 Mar 2013 Location: Titahi Bay Status: Online Posts: 1747 |
Post Options
Thanks(0)
Quote Reply
Posted: 26 Nov 2024 at 9:42am |
|
Thanks Ian, I had actually watched that on Saturday.
I would be keep to give the threading a go as opposed to pinning the valves. I am cautious with all that pressure, so until I have seen the correct calculations from a competent person, I wouldn't try it.
|
|
|
|
|
nunga
Admin
Joined: 09 Mar 2013 Location: Pukekohe Status: Offline Posts: 1125 |
Post Options
Thanks(0)
Quote Reply
Posted: 26 Nov 2024 at 10:49am |
|
yeah you need to be very careful with the threads. Pinning is the safer way to go for sure. 1 psi = 0.070306958 kilogram-force/sq. cm Example: convert 15 psi to kilogram-force/sq. cm: So 3000PSI equals 210.9KG of force. |
|
|
2nd place HP springer - WFTF World Championships 2014
|
|
|
|
|
Pauly5
Forum Moderator
Joined: 11 Mar 2013 Location: Titahi Bay Status: Online Posts: 1747 |
Post Options
Thanks(0)
Quote Reply
Posted: 04 Dec 2024 at 4:18pm |
|
Work has been very busy the last couple of weeks, so progress has been slow. I have also had issues drilling and tapping this damn stainless probe. I thought I had it sorted, but I now think I had the drill speed too fast.
I also bought myself some decent metal cutting paste too. Anyway, one thing I bought off FB marketplace was a Rotring drawing board for $30. When I was at school I loved Technical drawing and used to have a similar board. I have a few of my parts hand drawn, so now I can draw them to scale. When making the part, I can now concentrate on the making rather than design and turning at the same time. The probe is on it's 3 rd design change now and I am pretty sure this is going to work. I also made the hammer which you can see in the photo. It is made from steel, but has a delrin skirt that is just a touch bigger, so it runs on the delrin. Aluminium is quite a sticky material and the delrin solves the friction between the steel and alu, especially when cocking. In my other pistols I have had to generously lube the tube to overcome this issue. I also started on the grip, doing a trial run using some birch ply glued together. I plan on making the grip from some walnut I have. So I'll update that once I get into it properly. 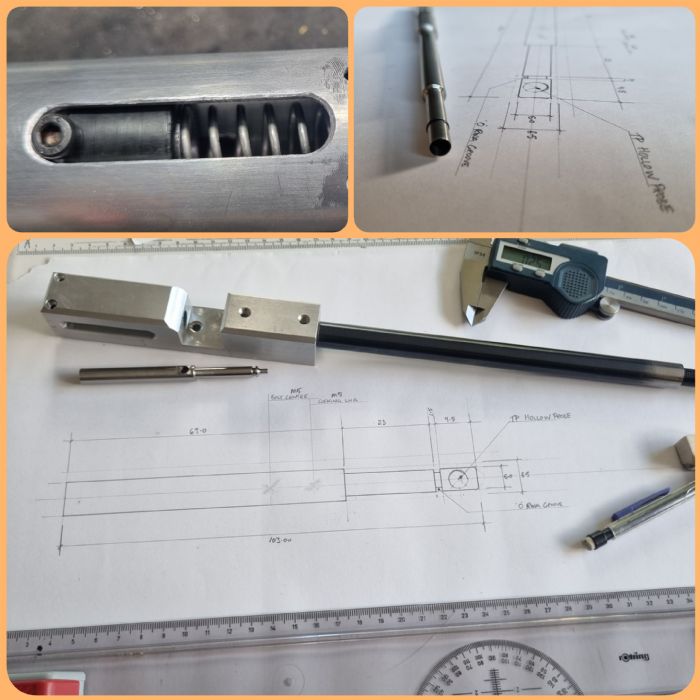 |
|
|
|
|
Post Reply
|
Page <12345 6> |
 Tweet
Tweet
|
| Forum Jump | Forum Permissions You cannot post new topics in this forum You cannot reply to topics in this forum You cannot delete your posts in this forum You cannot edit your posts in this forum You cannot create polls in this forum You cannot vote in polls in this forum |


 Topic Options