Valve mod - pcp pistol |
Post Reply 
|
Page <1 23456> |
| Author | |
Pauly5 
Forum Moderator 
Joined: 11 Mar 2013 Location: Titahi Bay Status: Offline Posts: 1746 |
 Post Options Post Options
") Thanks(0) Thanks(0)
 Quote Reply Quote Reply
 Posted: 29 Oct 2024 at 3:09am Posted: 29 Oct 2024 at 3:09am |
|
Next I contoured the base of the breech to fit onto the 32mm tank. I used a combo of flat end mill and a 32mm wood bit.
Unfortunately the wood bit isn't an exact shape with a flat spot making the resulting cut a bit like a flattened dome, so I cut a chanel out with the end mill so there's good contact. I will use a bit of fine sandpaper on a tube to take the sharp edges off the cut later. So you can see what look like corrugations in the cut face. This is probably from my small mill picking up vibrations, but for this purpose it's fine and the light makes it look worse than what it is. 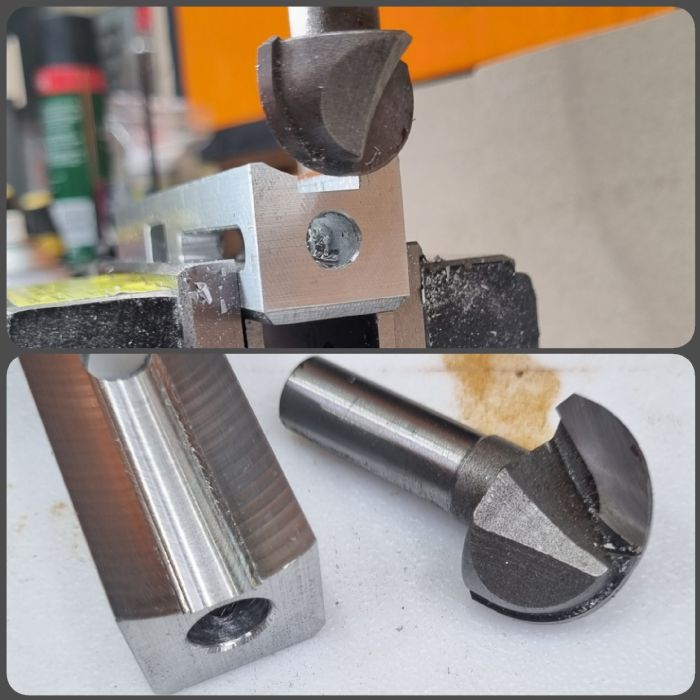 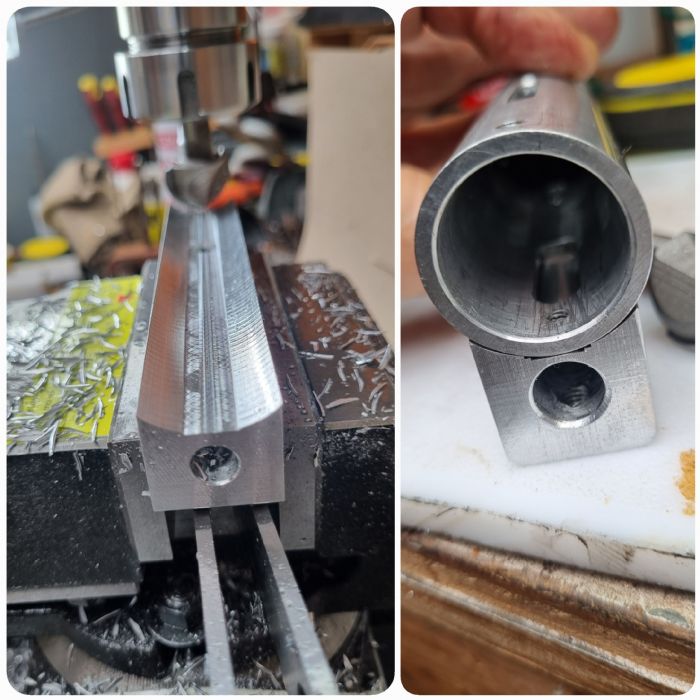 |
|
 |
|
|
RangerPete
Senior Member 
Joined: 19 Apr 2023 Location: Cambridge. Status: Offline Posts: 1105 |
Post Options
Thanks(0)
Quote Reply
Posted: 28 Oct 2024 at 8:32am |
|
Thats all looking really smart Pauly. Amazing stuff you'r doing there!
Im very keen to see how it is all going to come together 
|
|
|
Walk quietly, but carry a big stick.
|
|
|
|
|
Pauly5
Forum Moderator
Joined: 11 Mar 2013 Location: Titahi Bay Status: Offline Posts: 1746 |
Post Options
Thanks(0)
Quote Reply
Posted: 28 Oct 2024 at 6:56am |
|
I had a good stint in the garage this weekend and have made good and steady progress on this build. I have found that accomplishing one section, then have a cleanup, small break, then onto the next is working well for me. It helps me clear my head for the next part. Not to mention making my wife a coffee and a quick chat too.
 So I got the barrel fitted then milled out the loading breech. then drilled and tapped two retaining grub screws for the barrel. Next I chamfered the corners on the top. I'm not totally sure what I am going to do here, but have been toying with keeping it with clean lines and mount a small red dot. I could also fasten a weaver rail to it The result emerged from the aluminium mess.` 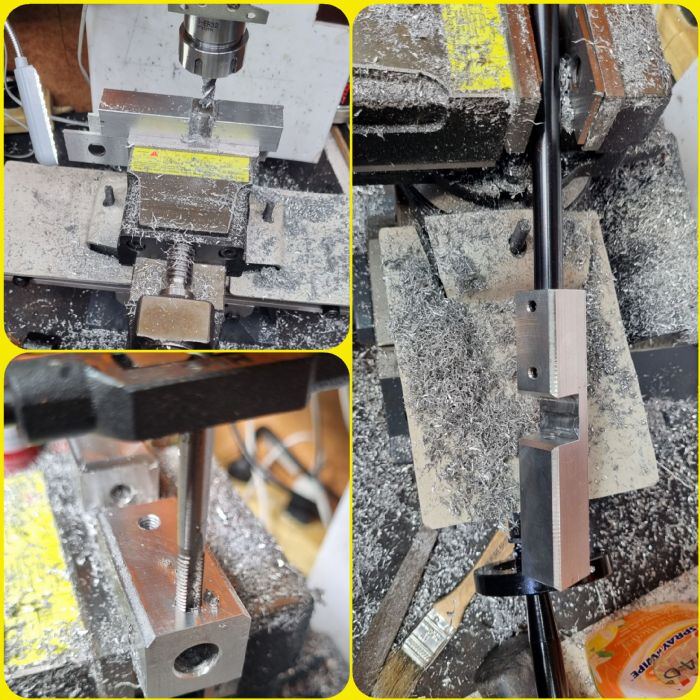 Now that the barrel is fitted I was able to start on the bolt. This turned out really well and confirmed that the barrel and bolt are nicely lined up.Alu had an 8.5mm bore and I reduced the stainless bolt to 8.3 mm at the back and 6.03 mm for the probe part and it slide into place beautifully, so I am very pleased with that. 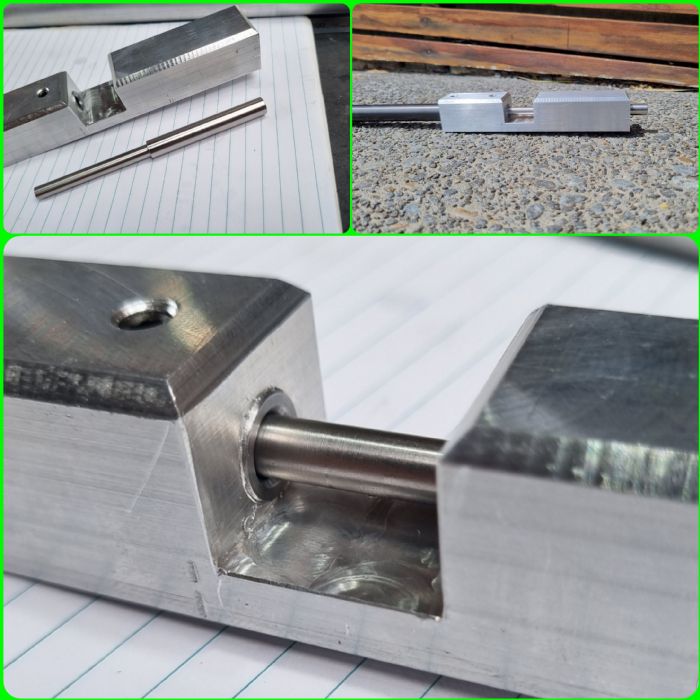 I had also made a preliminary mockup for a fill valve to include a gauge. This is not the final piece, but I know what I want to do. Gauge is mounted into a boss that I plan to have a barrel support fitted to. Fill probe fits nicely underneath it. I just need to get a 10mm x 1.0mm thread tap for the gauge. Also see the finished firing valve body, poppet and seat. They came up really well and I am excitied to see how well it works. Looks good for now anyway. Note the custom Nunga forged brass wrapped in my hori custom made spring.  |
|
|
|
|
kruzaroad
Senior Member

Joined: 03 Jul 2022 Location: Hastings 4 now Status: Offline Posts: 3023 |
Post Options
Thanks(0)
Quote Reply
Posted: 23 Sep 2024 at 6:16am |
|
It has quite a high polish to it.
Think you have to be careful with the pics, one thing I've noticed is they tend to make very miniscule grooves look huge. You can't always believe a pic. |
|
|
|
|
Pauly5
Forum Moderator
Joined: 11 Mar 2013 Location: Titahi Bay Status: Offline Posts: 1746 |
Post Options
Thanks(0)
Quote Reply
Posted: 23 Sep 2024 at 2:49am |
|
Thanks guys, yes I was going to use something to bed the two together. I have Autosol, valve grinding compound and even toothpaste.
Nunga, this is kind of a test run. I don't know how well this will work and so the good thing is that I can take the whole valve system out and replace it, so I will use your piece of brass because it was made for it. It means something to me to use the piece cast especially for it. I can make the mistakes on this first one.
The other thing I was going to do was make the seat out of delrin. |
|
|
|
|
KiwiTR6
Senior Member

Joined: 04 Nov 2022 Location: North Island Status: Offline Posts: 449 |
Post Options
Thanks(0)
Quote Reply
Posted: 23 Sep 2024 at 2:36am |
|
Paul, I've found Solvol Autosol to be excellent for final polishing. I'm not sure if it would be coarse enough to finalise the metal to metal seal though. I have heard of people using moistened cigarette ash on fuel needle jets, but that's probably finer again.
|
|
|
Daystate Red Wolf .22
FX Dreamline .22 Diana Outlaw .22 HW98 .177 HW30 .177 FWB 124 .177 Diana 35 .177 Diana 340 N-Tec .177 Diana 34 EMS .177 Diana Mod 25 .177 Diana Two Forty .177 Crosman 2240 .22 |
|
|
|
|
nunga
Admin 

Joined: 09 Mar 2013 Location: Pukekohe Status: Offline Posts: 1125 |
Post Options
Thanks(0)
Quote Reply
Posted: 23 Sep 2024 at 2:34am |
|
Silly question, You are going to lap the seat in right? That brass looks nice but is it just the picture or are there a lot of machine marks still on the face of that? hope it seals. Nice work! I will get the other brass sent out again for you anyway and you can use it on another project if you dont need it for this now.
|
|
|
2nd place HP springer - WFTF World Championships 2014
|
|
|
|
|
Pauly5
Forum Moderator
Joined: 11 Mar 2013 Location: Titahi Bay Status: Offline Posts: 1746 |
Post Options
Thanks(0)
Quote Reply
Posted: 22 Sep 2024 at 5:46pm |
|
So i found a piece of brass to use. I have made the poppet valve and loctited it to the stem.
After it was fastened I finished off the seat and polished it so the it was concentric with the shaft. I am quite pleased with how it turned out, but of course being pretty doesn't mean it works. I also polished the valve seat. I have some of the 3M polishing cloths, 800 up to 15000 grit. It is satisfying working through them and seeing the finish improve. 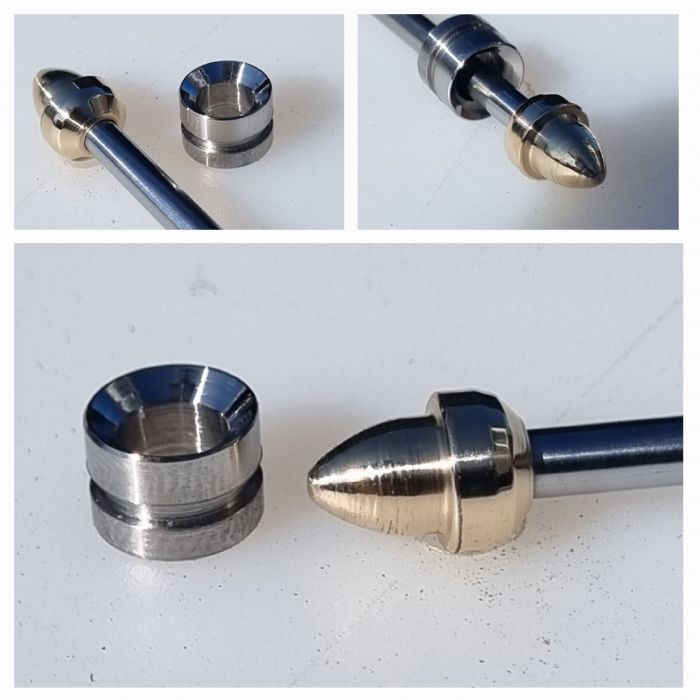 |
|
|
|
|
J-S
Senior Member
Joined: 20 Oct 2014 Location: Auckland Status: Offline Posts: 510 |
Post Options
Thanks(0)
Quote Reply
Posted: 21 Sep 2024 at 5:39am |
|
very cool
|
|
|
J S Airguns
Air Arms TX200('s) Theoben Sirocco HW77 FWB 300s Webley Patriot One or two others... Current projects: Too many.. |
|
|
|
|
Pauly5
Forum Moderator
Joined: 11 Mar 2013 Location: Titahi Bay Status: Offline Posts: 1746 |
Post Options
Thanks(0)
Quote Reply
Posted: 20 Sep 2024 at 5:19pm |
|
Barrel is around 300 mm, so not a small pistol.
|
|
|
|
|
RangerPete
Senior Member
Joined: 19 Apr 2023 Location: Cambridge. Status: Offline Posts: 1105 |
Post Options
Thanks(0)
Quote Reply
Posted: 20 Sep 2024 at 4:19pm |
|
So how long are you planning on making the barrel?
|
|
|
Walk quietly, but carry a big stick.
|
|
|
|
|
Pauly5
Forum Moderator
Joined: 11 Mar 2013 Location: Titahi Bay Status: Offline Posts: 1746 |
Post Options
Thanks(0)
Quote Reply
Posted: 19 Sep 2024 at 3:50pm |
|
Slowly doing stuff.
NZ Post has botched up Nunga's foundry delivery, so valve on hold. I bought a piece of 3.9 mm piano wire today. Pretty hard, and hopefully harden up, but I might try that for the valve stem. I also decided to use the .25 cal FX barrel I had. It was off a Bobcat. I cut it down and reduced the breech end to fit into what will be the breech block for this build. Fits nice and snug with no movement. FX only rifled the last 2 or 3 inches of these barrels and you can see that they make the muzzle smaller diameter to do this, then thread on a piece to match. You can see the marks on the outside where they "squeeze" the rifling in giving it a "smooth" twist. 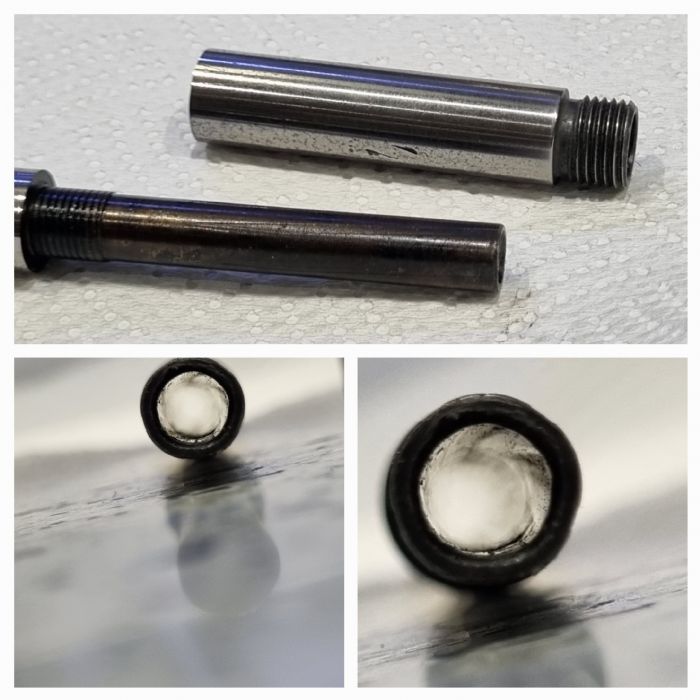 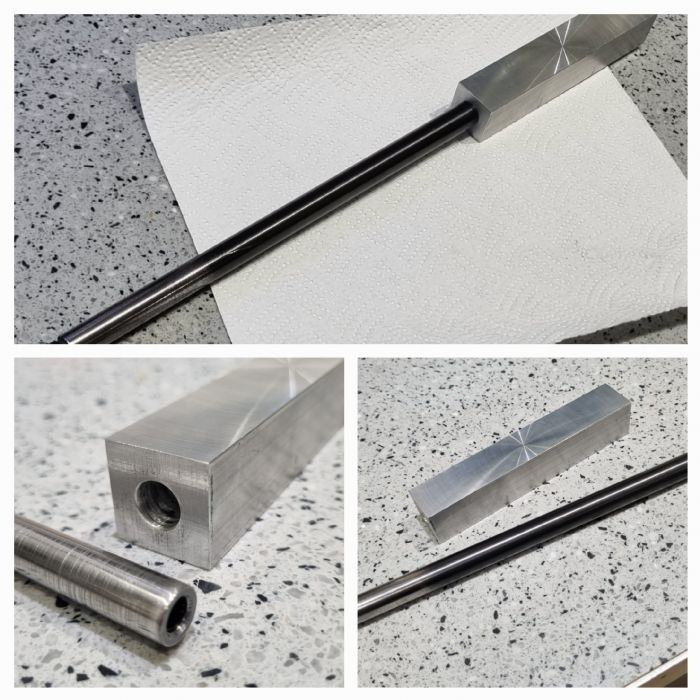 |
|
|
|
|
RangerPete
Senior Member
Joined: 19 Apr 2023 Location: Cambridge. Status: Offline Posts: 1105 |
Post Options
Thanks(0)
Quote Reply
Posted: 10 Sep 2024 at 5:08pm |
|
Good luck with that 😂
|
|
|
Walk quietly, but carry a big stick.
|
|
|
|
|
Pauly5
Forum Moderator
Joined: 11 Mar 2013 Location: Titahi Bay Status: Offline Posts: 1746 |
Post Options
Thanks(0)
Quote Reply
Posted: 10 Sep 2024 at 4:06pm |
|
Well I tried cutting one of my donor screw drivers and it was hard. The hacksaw had trouble biting into it. It made a small nick, so I just put it in the vice and it snapped on the nick.
Doing pest control I was always up in ceilings and sparkies often forget stuff and they do like to have expensive screwdrivers which are decenyly hardened. So I have a couple I can wreck. So this will be my valve stem. 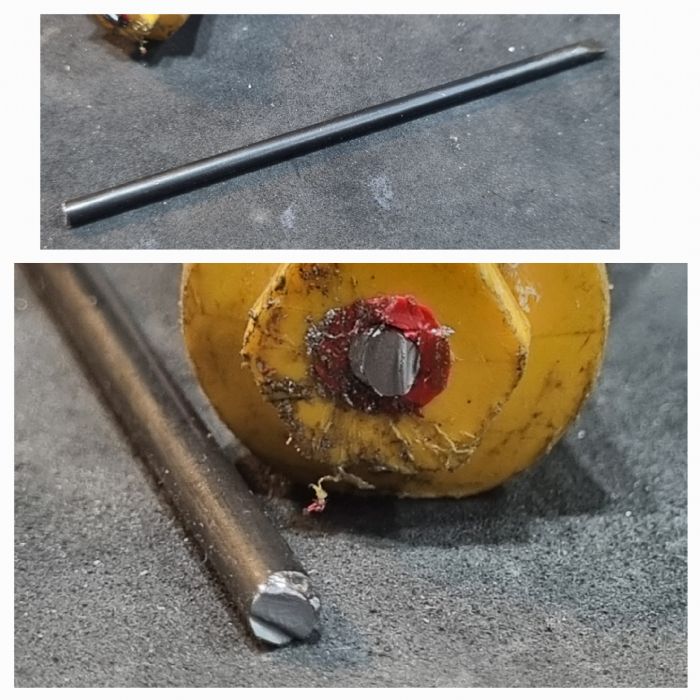 |
|
|
|
|
Pauly5
Forum Moderator
Joined: 11 Mar 2013 Location: Titahi Bay Status: Offline Posts: 1746 |
Post Options
Thanks(0)
Quote Reply
Posted: 08 Sep 2024 at 2:26pm |
|
So should I remake that valve seat in brass and the harder material for the moving part of the valve. Poppet valve?
|
|
|
|
|
Post Reply
|
Page <1 23456> |
 Tweet
Tweet
|
| Forum Jump | Forum Permissions You cannot post new topics in this forum You cannot reply to topics in this forum You cannot delete your posts in this forum You cannot edit your posts in this forum You cannot create polls in this forum You cannot vote in polls in this forum |


 Topic Options