Rekord trigger mod
Printed From: Kiwi Airgunners
Category: Technical
Forum Name: Pauly's Technical Area
Forum Description: Technical information, Modifications and DIY projects are all in here
URL: www.kiwiairgunners.co.nz/forum_posts.asp?TID=237
Printed Date: 19 Jul 2026 at 3:16am
Software Version: Web Wiz Forums 10.14 - http://www.webwizforums.com
Topic: Rekord trigger mod
Posted By: Pauly5
Subject: Rekord trigger mod
Date Posted: 03 Oct 2015 at 4:32pm
|
I,ve been following a guy make a stock on another forum, but he also did this trigger mod and so I'm giving it a go. Basically making a new trigger blade, but using bearings for the pivot to eliminate as much play as possible and to be able to adjust the stages by using set screws in place of the roller pins. I might even alter the pivot point forward in the housing, which will change the geometry making the second stage much smoother and lighter while remaining safe. I hope I actually finish it too. here goes. Got some 5 x 2.5 x 2mm bearings and 2mm axle 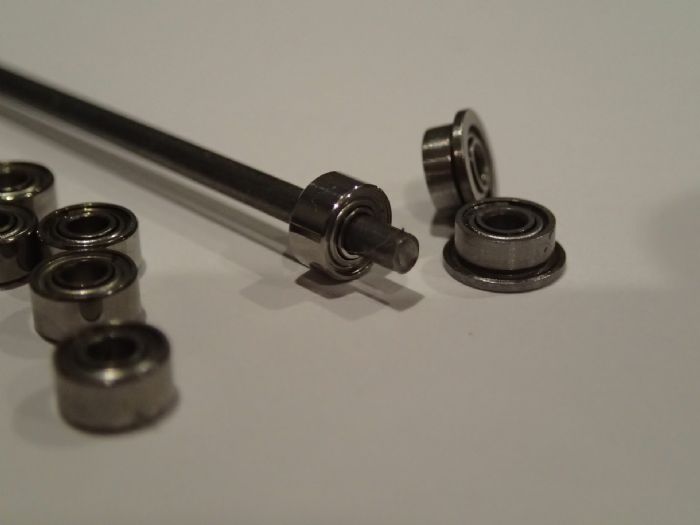 Remove trigger unit. Note heaps of dirty grease on sears. I will polish and clean these once I've done the trigger blade. 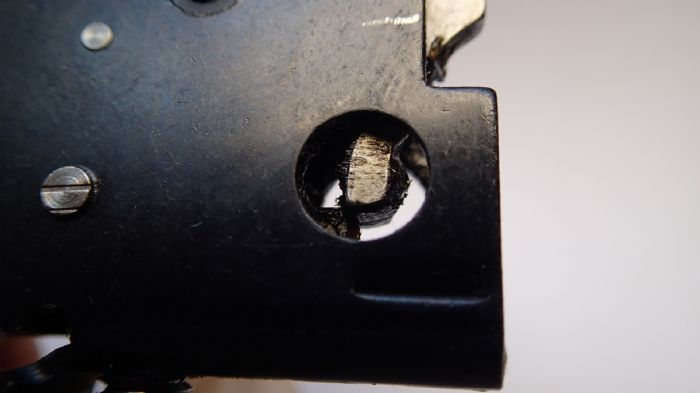 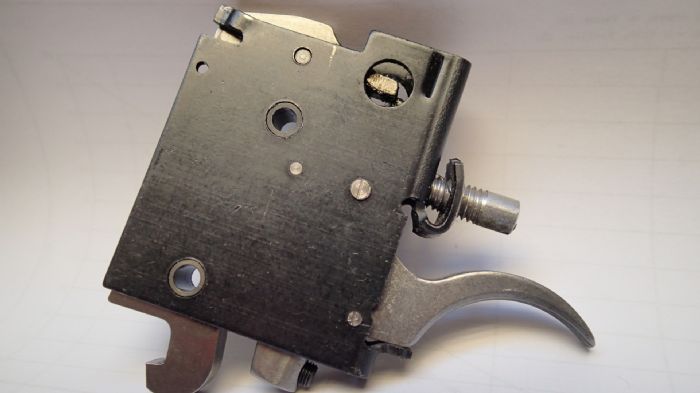 I drill the 5mm hole for the bearing. I will work off this point as I can put the original trigger on and off as I go as a reference. 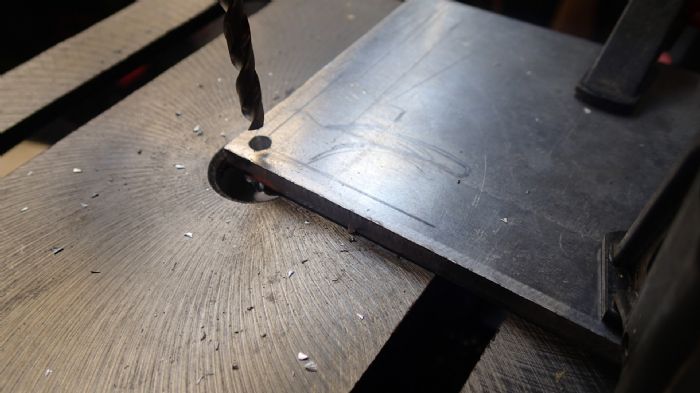 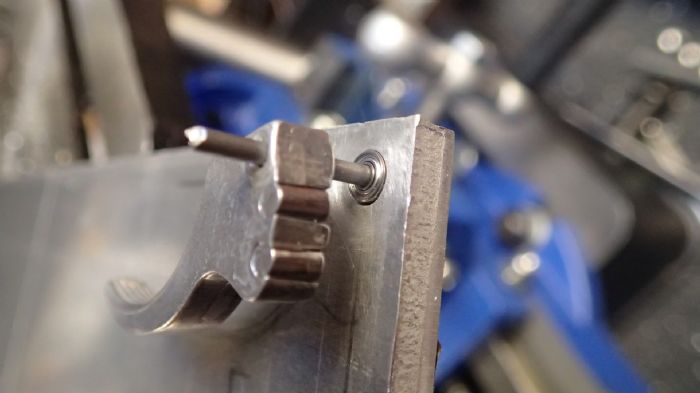 Then comes the cutting. This is just std aluminium so I can remove the rough stuff, but I just don't have any other way of cutting out the shape. 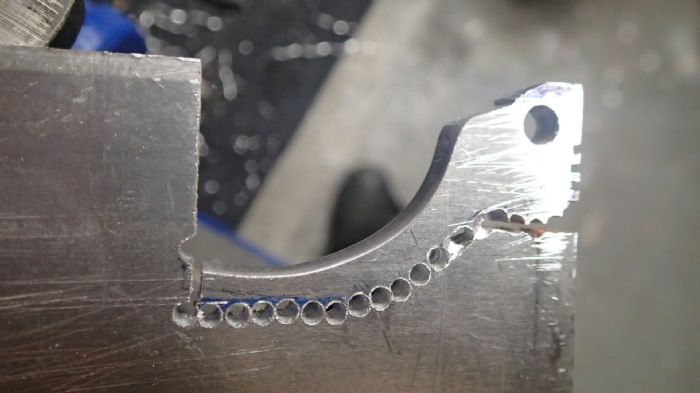 I plan to make it set back a bit more and straighter than the original. 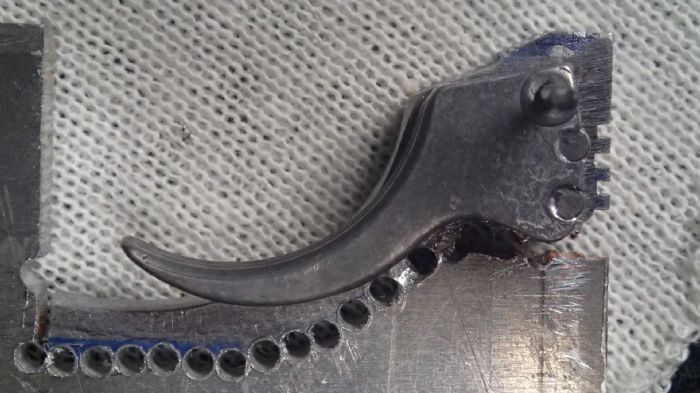 That was it for tonight. Thought I would stop there before I either cocked it up or realised I had already made a mistake.
 |
Replies:
Posted By: nunga
Date Posted: 03 Oct 2015 at 6:47pm
|
Very interesting looking forward to seeing it finished ------------- 2nd place HP springer - WFTF World Championships 2014 |
Posted By: Pauly5
Date Posted: 04 Oct 2015 at 3:21pm
|
Disaster! So close though. I got the first stage in and as I was tapping the second the bloody tap broke in the hole. I guess I was getting excited and not patient enough. But it worked, even with just the first stage. Will post pictures to disaster stage later, then start on the next one. ------------- |
Posted By: Pauly5
Date Posted: 04 Oct 2015 at 5:05pm
|
Ok, so all going well at this stage. I decided to use the bearings with a flange as they took up play in the trigger housing. 6 mm aluminium + 2 x .5 mm flanges = 7 mm. Perfect fit. 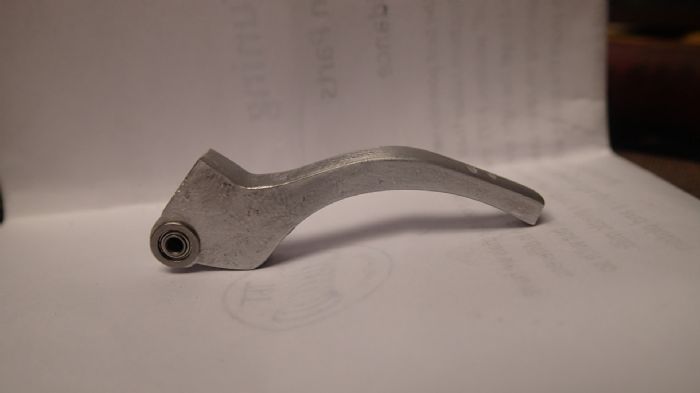
Drill the first stage hole. 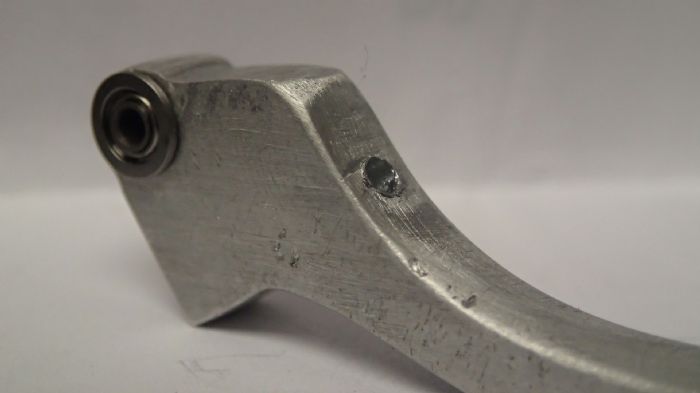 Then drilled the second. I tapped the thread for the first stage. 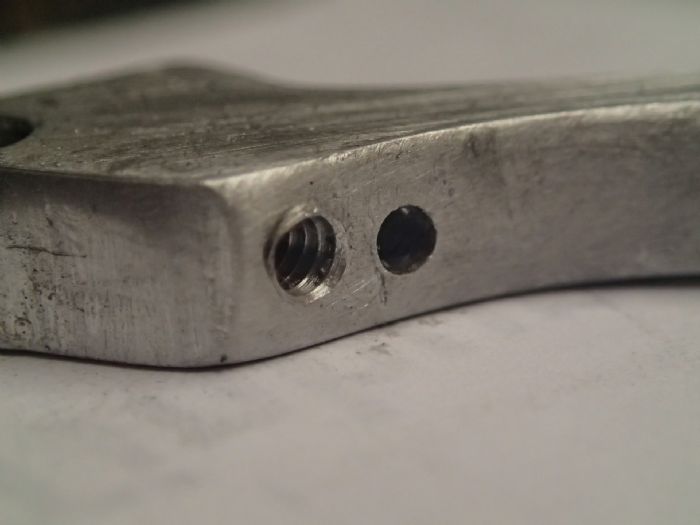 Then I started tapping the second and the tap broke. Here's a shot of the trigger as it sits now. It works but One stage only. I will start another tomorrow. 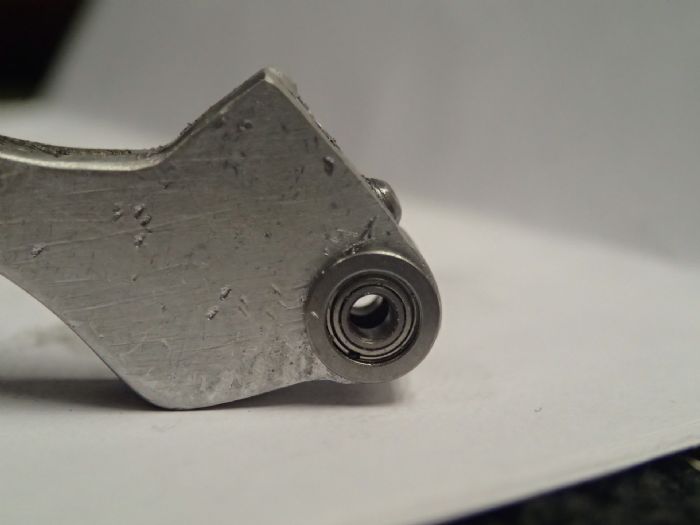 ------------- |
Posted By: Pauly5
Date Posted: 10 Oct 2015 at 4:36pm
|
Ok, take 2. I now have an adjustable, functioning 2 stage trigger. I think I had drilled the holes too small and the tap was gripping too much in the hole. With these ones I made the hole 2.5 mm instead of 2 mm. There was still some movement when the set screw is in place.so I gave the side a tap with the hole punch tightening up the screw. Set screws were 3 mm. What I like about this rekord trigger is that you can test it without being installed in the gun. The let off feels very light at this stage, but who knows, I could have spent all that time accomplishing nothing   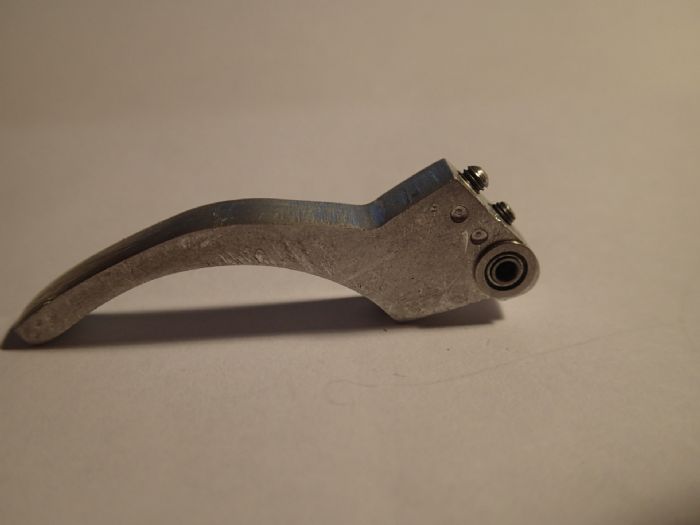 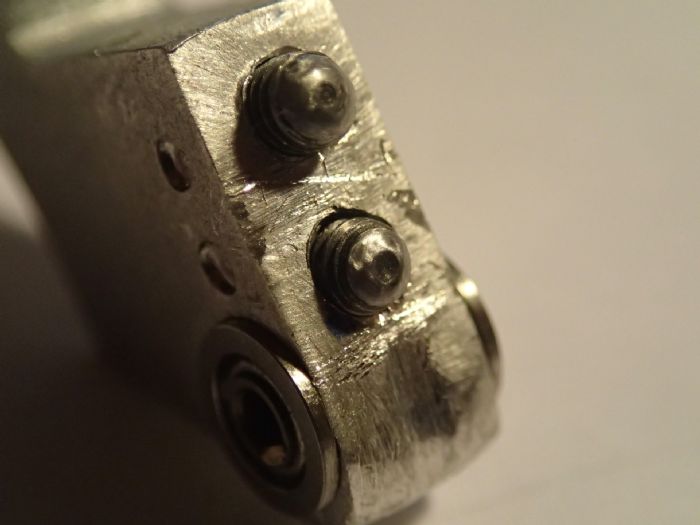 Don't look too close at the workmanship. Macro on the camera doesn't help. 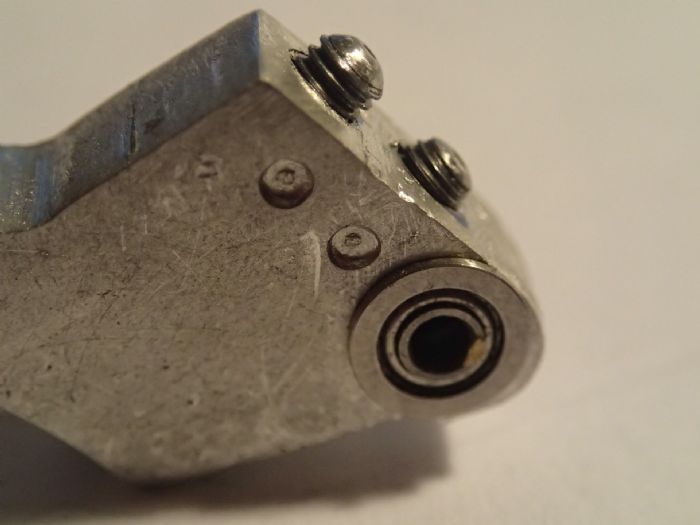 The blade is still too long to fit in the guard so the next thing is to cut it off, then tidy it up as much as possible. I will polish the sears then refit the unit for field testing. 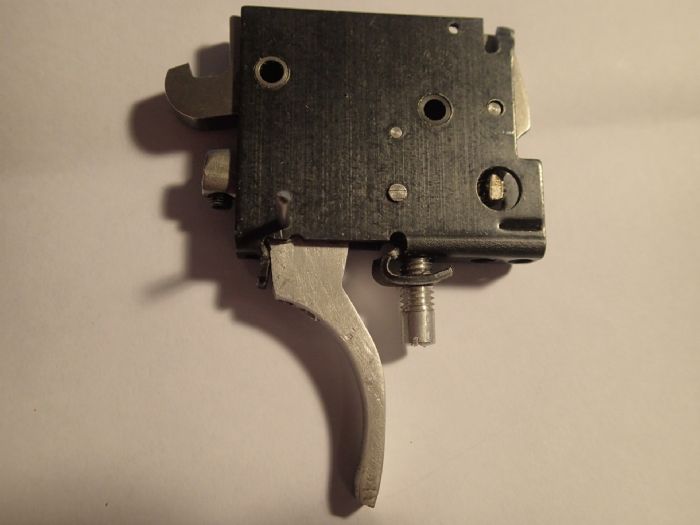 ------------- |
Posted By: nunga
Date Posted: 10 Oct 2015 at 5:18pm
|
Nice work mate :) ------------- 2nd place HP springer - WFTF World Championships 2014 |
Posted By: Pauly5
Date Posted: 10 Oct 2015 at 6:12pm
|
Next thing I might do is to move the trigger forward by drilling a new hole in the case. Other forums say 6 mm. See how I go later. ------------- |
Posted By: nunga
Date Posted: 11 Oct 2015 at 3:47am
|
make sure you do drill the hole forward and not back or you will end up increasing the trigger pull weight :) ------------- 2nd place HP springer - WFTF World Championships 2014 |
Posted By: Pauly5
Date Posted: 15 Oct 2015 at 4:42pm
|
I installed the trigger unit back into the 95 today. After a few shots it is feeling good I must say. It's not fantastically different, but it feels softer and lighter, plus the different shaped trigger being a bit closer to the grip feels better. (short fingeritis) Not that the Rekord ever felt bad, but I think I like the change. So I will just shoot it for a while before I go changing the position of the trigger axle forward. The let off just goes now, where before there was a slight resistance, then a crisp release, so I must have changed the geometry enough to safely lighten it. To test it, I loaded the gun, took safety off and struck the butt with a rubber mallet a few times and it never went off, so I'm happy. 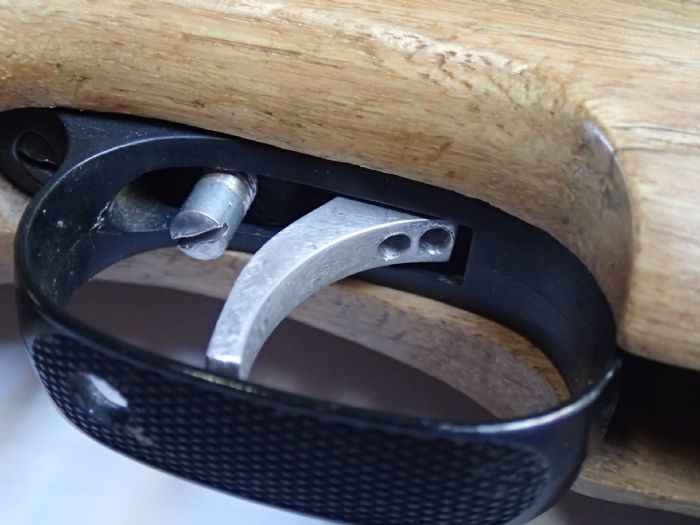 You can see the two adjustment screw holes, 1st and second stage easily accessible while fitted. 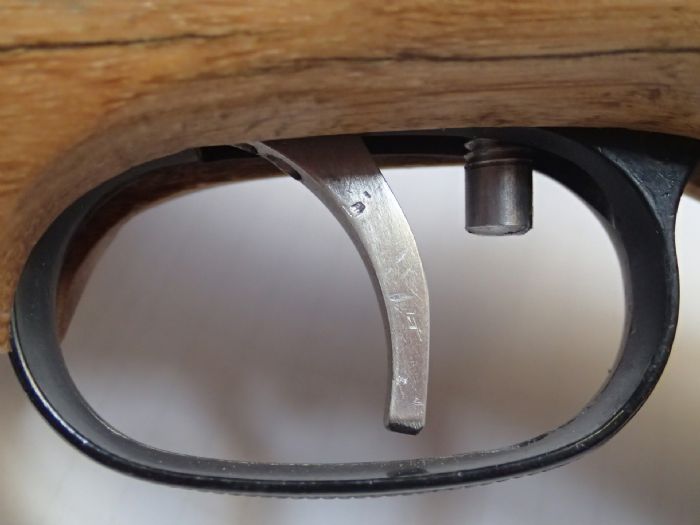 I will take it out and polish it up after I've shot some stuff with it. 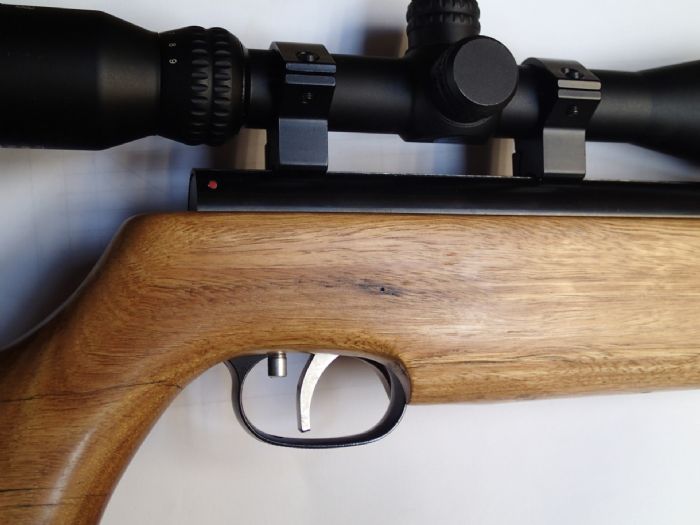 And that's it. If I made one that is set back anymore I would have to change the trigger weight screw out for a shorter one.  ------------- |
Posted By: Pauly5
Date Posted: 23 Jul 2017 at 4:35am
Well I'm back making another trigger. I made a new stock, and want to set the trigger back. I may or may not have measured something wrong when inletting, but that's another story.  In the trigger blade I made above I used set screws with polished ends, this time i want to use a roller for where the blade contacts with the sear arm. My questions is, I would need to use hardened steel correct? Where do I get a bit of rod approx 3 mm? Drill bit, section of spring, shaft of a small screw driver? Will heating and quenching be good enough for my purpose? I know this will only work for high carbon steel, so are any of those things high carbon? And how would I cut and smooth it if it is hardened, or do I do all that before hardening it? Lots of questions for you engineer minded gunners. Thanks in advance. ------------- |
Posted By: nunga
Date Posted: 25 Jul 2017 at 3:55am
|
I would just use a small ball bearing its already hardened and nice and smooth. or go to your local engineering shop and have a look at what hardened pings they have. ------------- 2nd place HP springer - WFTF World Championships 2014 |
Posted By: Pauly5
Date Posted: 25 Jul 2017 at 5:27pm
|
Ended up doing the set screw thing again. worked well. It's lightened the trigger a tad, but still good safe sear engagement. ------------- |