Pistol build |
Post Reply 
|
Page <1 3456> |
| Author | |
Pauly5 
Senior Member 
Joined: 10 Mar 2013 Location: Titahi Bay Status: Offline Posts: 1172 |
 Post Options Post Options
") Thanks(0) Thanks(0)
 Quote Reply Quote Reply
 Posted: 09 Dec 2023 at 4:47pm Posted: 09 Dec 2023 at 4:47pm |
|
If it's anything like the last build, 2000 psi seems to be best for this unregulated setup. More pressure and the hammer can't hit the valve hard enough the way it is, and the first few shots are really slow until the tank drops in pressure, so it's a waste to go higher.
So I have now dissassembled it and have washed everything to get rid of any swarf and oils. It's amazing how much work goes into this. Each of the caphead screws that retain the valves has been turned down to perfectly fit the hole and countersunk hole in the valve blocks. This means no movement when the tank is pressurized and they all bear the load equally. There's more, but that'd get boring. All clean and dry awaiting refitting. 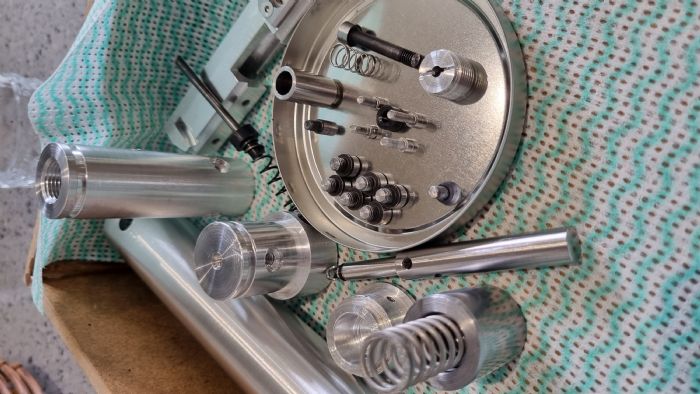
|
|
 |
|
|
J-S
Senior Member
Joined: 19 Oct 2014 Location: Auckland Status: Offline Posts: 356 |
Post Options
Thanks(0)
Quote Reply
Posted: 11 Dec 2023 at 11:00am |
|
Looks bloody cool. Like the straight pull cocking!
|
|
|
J S Airguns
Air Arms TX200('s) Theoben Sirocco HW77 FWB 300s Webley Patriot One or two others... Current projects: Too many.. |
|
|
|
|
Pauly5
Senior Member
Joined: 10 Mar 2013 Location: Titahi Bay Status: Offline Posts: 1172 |
Post Options
Thanks(0)
Quote Reply
Posted: 13 Dec 2023 at 11:51pm |
|
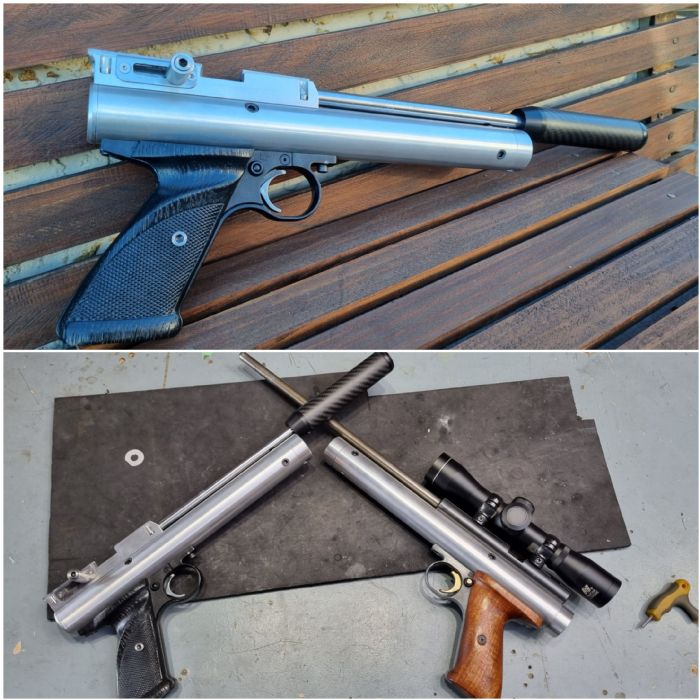
Time for duelling pistols. Completed the second build and had a quick shoot. putting out 10 fpe. Still some things to refine, but shoots nice.
 |
|
|
|
|
kruzaroad
Senior Member

Joined: 02 Jul 2022 Location: Hastings 4 now Status: Online Posts: 1671 |
Post Options
Thanks(0)
Quote Reply
Posted: 14 Dec 2023 at 8:21am |
|
looking good Pauly.
Like the breech on second. What's the size difference compared to original. 10 ft. Lb is a good amount of power for a bird gun. Fancy chucking a stock on one and testing it out to 30m? Be keen to see its accuracy when it streaches out a bit. Whats the end goal? Hunting pistol, target pistols? Decided on a finish for them or you they stay metal?
|
|
|
|
|
Pauly5
Senior Member
Joined: 10 Mar 2013 Location: Titahi Bay Status: Offline Posts: 1172 |
Post Options
Thanks(0)
Quote Reply
Posted: 14 Dec 2023 at 8:55am |
|
End goal? Enjoyment, and functionality. It is a really interesting question though as sometimes the build is directed by what you can do, then as you get more confidence it changes. For example the latest one I made the breech myself and it has it's quirks, but on the next one I know better what to do.
I don't plan to change colour, but have wondered what home anodising would look like, but quite like that semi polished alu with black or walnut look. Giving them a polish seems to harden the surface a bit too and they don't mark as much as unpolished. They are both the same tank size and calibre. Latest has a shorter barrel. Yea, I will try the stock on them, as I am keen to see what they go like at longer distances too. I will put a rifle scope on also as the pistol scope is challenging to use.
|
|
|
|
|
kruzaroad
Senior Member
Joined: 02 Jul 2022 Location: Hastings 4 now Status: Online Posts: 1671 |
Post Options
Thanks(0)
Quote Reply
Posted: 14 Dec 2023 at 9:10am |
|
That bluing you get from heat treating would pretty awsome too, l think. Another possibity could be to bore the cylinder tube in a solid square block of Aluminium and then shape the outside for grip.
Just throwing random ideas. Pistols are great as is, but you know arm chair spectator and all that. 👍
Edited by kruzaroad - 14 Dec 2023 at 9:10am |
|
|
|
|
Pauly5
Senior Member
Joined: 10 Mar 2013 Location: Titahi Bay Status: Offline Posts: 1172 |
Post Options
Thanks(0)
Quote Reply
Posted: 14 Dec 2023 at 9:18am |
|
If I had a big enough machine I could do more.
Blueing sounds good, but don't think alu responds to that. I am coming up with a trigger frame made out of alu plate, or even a block including trigger frame that the air tube attaches too. Ideas are great, it's surprising that although some seem ambitious, there are concepts and ideas to be taken from them.
|
|
|
|
|
J-S
Senior Member
Joined: 19 Oct 2014 Location: Auckland Status: Offline Posts: 356 |
Post Options
Thanks(0)
Quote Reply
Posted: 14 Dec 2023 at 1:14pm |
|
Sweet pair! now... how about spring loaded bolt so you pull back and lock open to load it then a button releases the bolt forward ready to fire??
 |
|
|
J S Airguns
Air Arms TX200('s) Theoben Sirocco HW77 FWB 300s Webley Patriot One or two others... Current projects: Too many.. |
|
|
|
|
kruzaroad
Senior Member
Joined: 02 Jul 2022 Location: Hastings 4 now Status: Online Posts: 1671 |
Post Options
Thanks(0)
Quote Reply
Posted: 14 Dec 2023 at 2:28pm |
|
wouldn't that be hard on the probe?
Noisier than just closing it? Run the risk of wedging the pellet if it didn't sit straight. I know with the 1322 I like charged, then decocking the bolt slowly, pushing the pellet in with bolt, then leaving the bolt loose ( sitting in firing position, not locked but saftey on) which allows me to keep the hammer spring from sitting under tension as I wait or stalk. Extend probe (Pauly made) needs to be cocked to allow the pellet to fit, so no chance of pellet falling out if not cocked. Plus the probe pushes it in far enough it doesn't come loose. Cocking is just pull back, push forward, turn downwards in one short, quick, hardly noticable finger movement. But that's just my view. Could be a good set up for all I know never having tried a button release bolt.
|
|
|
|
|
Pauly5
Senior Member
Joined: 10 Mar 2013 Location: Titahi Bay Status: Offline Posts: 1172 |
Post Options
Thanks(0)
Quote Reply
Posted: 17 Dec 2023 at 12:41am |
|
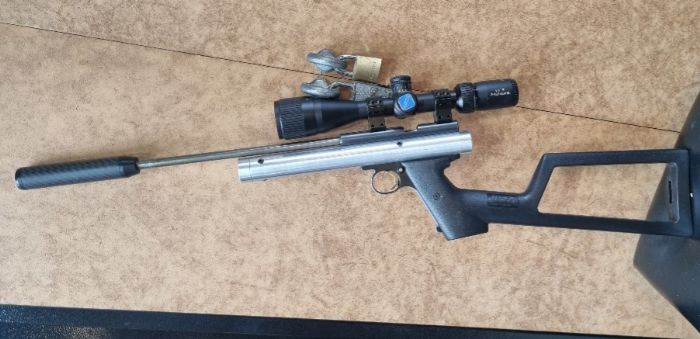
Here it is with stock and rifle scope.
|
|
|
|
|
Post Reply
|
Page <1 3456> |
 Tweet
Tweet
|
| Forum Jump | Forum Permissions You cannot post new topics in this forum You cannot reply to topics in this forum You cannot delete your posts in this forum You cannot edit your posts in this forum You cannot create polls in this forum You cannot vote in polls in this forum |


 Topic Options