Crosman hollow probe build |
Post Reply 
|
Page 123 4> |
| Author | |
Pauly5 
Forum Moderator 
Joined: 11 Mar 2013 Location: Titahi Bay Status: Offline Posts: 1746 |
 Post Options Post Options
") Thanks(0) Thanks(0)
 Quote Reply Quote Reply
 Topic: Crosman hollow probe build Topic: Crosman hollow probe buildPosted: 10 May 2023 at 4:11pm |
|
With new enthusiasm I started making a couple of new hollow probes. These allow the air or CO2 to travel up and act directly into the back of the pellet. The other design factors i've included are a tapered edge that fits inside the pellet skirt and enough length that it seats the pellet past the transfer port into the breech. I tapered the edge so that it should help engage the skirt with the rifling and so create a good seal.
I will let the photos do the talking, but this is progress so far. First photo shows the main profile and O ring groove formed 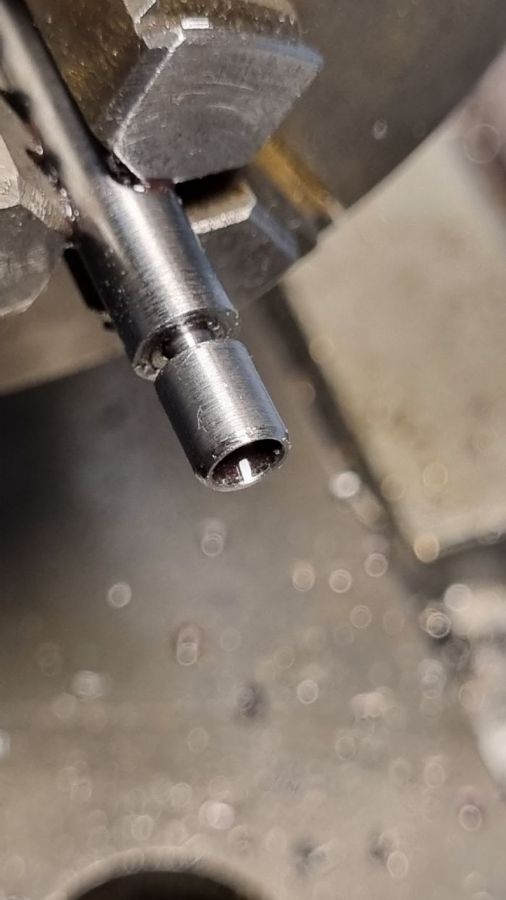 Here you can see the probe halfway across the TP, and second photo shows a clear passage through probe.  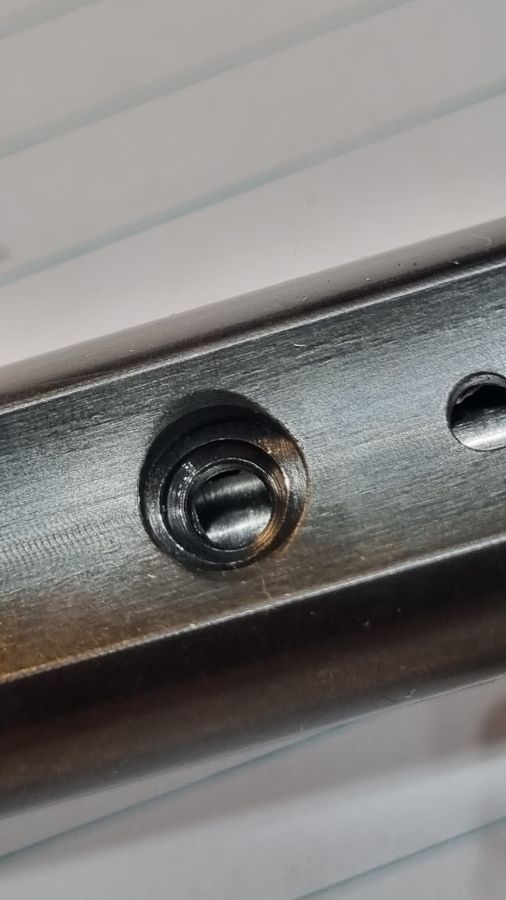 The next couple are various angles of the hollowed out probe. I still need to workout the bolt hole angle and placement so that the hole lines up with the transfer port when pushed home. 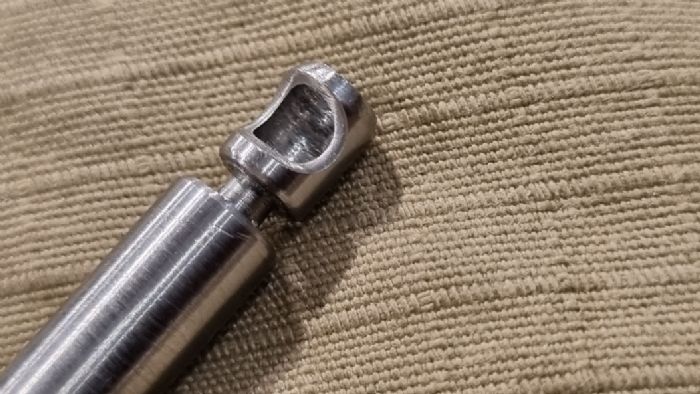 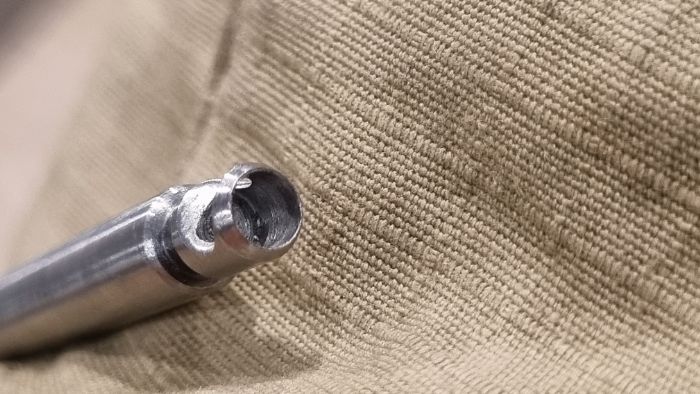 One more showing how the taper fits into the pellet skirt. 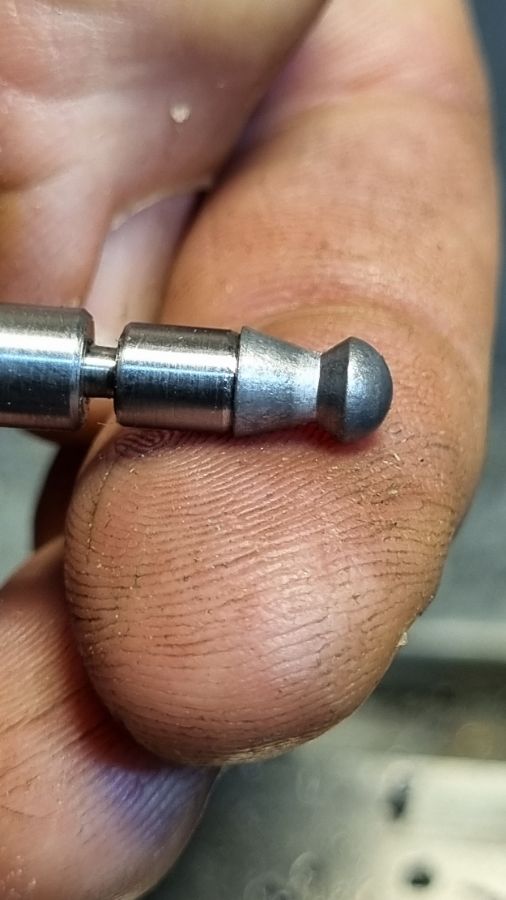 |
|
 |
|
|
Billbobnz
Senior Member 
Joined: 14 Jun 2020 Location: Ashburton Status: Offline Posts: 938 |
Post Options
Thanks(0)
Quote Reply
Posted: 11 May 2023 at 3:04am |
|
wow great work Paul, let use know if you get any increase of power when you test shooting it
|
|
|
|
|
nunga
Admin 

Joined: 09 Mar 2013 Location: Pukekohe Status: Offline Posts: 1125 |
Post Options
Thanks(0)
Quote Reply
Posted: 11 May 2023 at 4:57am |
|
I would be interested to see how much it cools down per shot due to the CO2 expanding at a faster rate. Looks good!
|
|
|
2nd place HP springer - WFTF World Championships 2014
|
|
|
|
|
kruzaroad
Senior Member

Joined: 03 Jul 2022 Location: Hastings 4 now Status: Offline Posts: 3023 |
Post Options
Thanks(0)
Quote Reply
Posted: 11 May 2023 at 5:07am |
|
Would not the easiest way to line the hole be to make the bolt/probe minus the hole, then with the breach attached to the barrel, lock the bolt shut turn the breach and barrel upside down in a vice, aline it and with a drill press, drill it to just shy of actual circumference needed then finish it off out of breech. This to me would eliminate the need to have to work out angles, as the hole is drilled at the correct point for the locked position of the bolt.
I love the tapered edge for end of probe. Assuming that pellet skirts are even and not causing a lockup against the barrel, I imagine that air/CO2 will after the initial push starting the pellet, push back causing the skirt to flare nicely with good pressure. Be keen to hear results when done. Looks like I might be ditching the extended probes I have which are awsome for your design if they work well. And of course if I can persuade you to make me a couple. |
|
|
|
|
Pauly5
Forum Moderator
Joined: 11 Mar 2013 Location: Titahi Bay Status: Offline Posts: 1746 |
Post Options
Thanks(0)
Quote Reply
Posted: 11 May 2023 at 6:32am |
|
I haven't tried it on CO2 yet.
Kruza, I had made one a while ago, and so I have exact measurements to follow that work for the probe tip, but I have made a hardened centre punch tool for marking the exact position of the bolt hole while the probe is in position. So this definitely works, but haven't compared it with the extended probe, but I feel both benefit over the factory probe by getting the pellet past the transfer port and have less restriction for the air/CO2 to get behind the pellet. I am going to try and make a few while I have my "flow on" if you know what I mean.  Billbobnz, I reckon there is an increase, but I often forget to make notes before I start, so don't have the comparison. I have fitted one to my 362, and compared it to a brand new 362 out of the box, and from 8 pumps I am getting 13.8 fpe, and the new std gun got 12.2 fpe with the same pellets.
|
|
|
|
|
J-S
Senior Member
Joined: 20 Oct 2014 Location: Auckland Status: Offline Posts: 510 |
Post Options
Thanks(0)
Quote Reply
Posted: 11 May 2023 at 8:07am |
|
Looks awesome! Could you have done the bolt handle first, close bolt firm in the breech then marked the TP hole for location? |
|
|
J S Airguns
Air Arms TX200('s) Theoben Sirocco HW77 FWB 300s Webley Patriot One or two others... Current projects: Too many.. |
|
|
|
|
Pauly5
Forum Moderator
Joined: 11 Mar 2013 Location: Titahi Bay Status: Offline Posts: 1746 |
Post Options
Thanks(0)
Quote Reply
Posted: 11 May 2023 at 12:53pm |
|
Yep, ok JS and Kruz I agree that would work too.
I don't drill the hole in the probe tip, but run a small round file across it. I didn't drill it because the wall is quite thin, and I was concerned if the drill bit snagged it would pull it out of shape and bugger it up. But I could definitely mark it up that way and then form the hole.
I'll do it on the next one. |
|
|
|
|
kruzaroad
Senior Member
Joined: 03 Jul 2022 Location: Hastings 4 now Status: Offline Posts: 3023 |
Post Options
Thanks(0)
Quote Reply
Posted: 11 May 2023 at 12:55pm |
|
But if it doesn't work you welcome to give us grief for the sujestion

|
|
|
|
|
jwabfrog
Senior Member

Joined: 13 Nov 2021 Location: Thames Status: Offline Posts: 175 |
Post Options
Thanks(0)
Quote Reply
Posted: 12 May 2023 at 2:36am |
|
Awesome engineering Pauly, you obviously have a lathe? Jeweller's size or something bigger?
|
|
|
|
|
Pauly5
Forum Moderator
Joined: 11 Mar 2013 Location: Titahi Bay Status: Offline Posts: 1746 |
Post Options
Thanks(0)
Quote Reply
Posted: 12 May 2023 at 3:07am |
|
Yea, it's a small one from the toolshed. Often referred to as a Chinese mini lathe.
I've had it a couple of years now and it's addictive learning how to set it up and use it. I'd recommend it if you're looking for another hobby. One thing I have learnt to appreciate is that tolerances are so important, and you can often make an ordinary everyday item better by reducing tolerances.
|
|
|
|
|
kruzaroad
Senior Member
Joined: 03 Jul 2022 Location: Hastings 4 now Status: Offline Posts: 3023 |
Post Options
Thanks(0)
Quote Reply
Posted: 12 May 2023 at 3:32am |
|
He put a pic of his lathe up on the site here
http://www.kiwiairgunners.co.nz/forum_posts.asp?TID=721 |
|
|
|
|
Pauly5
Forum Moderator
Joined: 11 Mar 2013 Location: Titahi Bay Status: Offline Posts: 1746 |
Post Options
Thanks(0)
Quote Reply
Posted: 12 May 2023 at 4:52am |
|
I finished drilling and fitting a bolt to the probe last night. The bolt is one I had started ages ago, and is probably too big to most peoples liking, but the good thing is that they are interchangable, so as I develop a good method of making the bolts, I will replace it later.
Probe fits and slides well in the breech, but the pellet can catch on that annoying screw hole in the bottom, so I am thinking of turning up small delrin plugs to fit in there, and see if that works. Anyway here's a couple more photos. 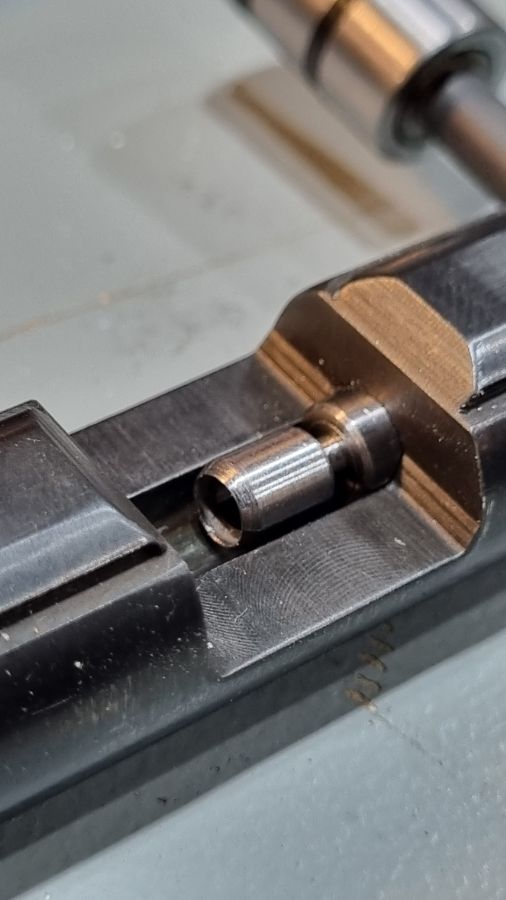 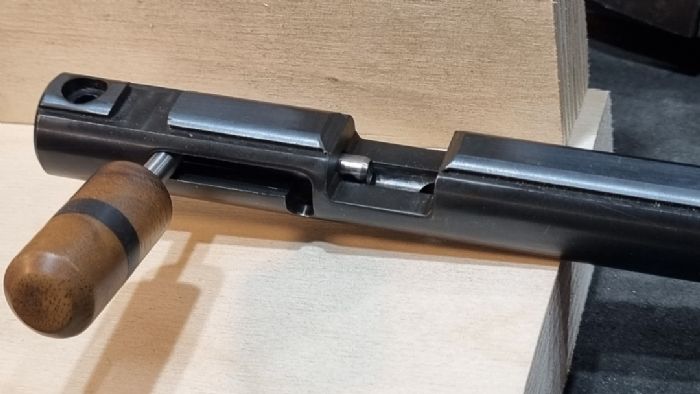 |
|
|
|
|
kruzaroad
Senior Member
Joined: 03 Jul 2022 Location: Hastings 4 now Status: Offline Posts: 3023 |
Post Options
Thanks(0)
Quote Reply
Posted: 12 May 2023 at 5:14am |
|
That looks good. I prefure a larger bolt handle personally, makes for easier working of bolt when your watching that starling moving around in the tree. Then you only have to take eyes off it to put pellet in.
Those little plugs are a good idea to block that screw hole. Are you going to reem/polish the inside of the hollow probe to smooth air flow through it? It may just be the photos make them look worse than they are but it looked pretty rough on the inside. |
|
|
|
|
Pauly5
Forum Moderator
Joined: 11 Mar 2013 Location: Titahi Bay Status: Offline Posts: 1746 |
Post Options
Thanks(0)
Quote Reply
Posted: 12 May 2023 at 5:31am |
|
I drilled it, then followed through with an end mill bit to flatten the bottom of the hole. I will probably try sandpaper on a dowel, but it's the light that makes it look worse than what it is.
I don't have any reaming tools.
|
|
|
|
|
kruzaroad
Senior Member
Joined: 03 Jul 2022 Location: Hastings 4 now Status: Offline Posts: 3023 |
Post Options
Thanks(0)
Quote Reply
Posted: 12 May 2023 at 5:36am |
|
I found also that when taking close ups up it tends to make every little channel or groove look like a valley.
Hence why I was a dubious about if it was just photo or actual finish. |
|
|
|
|
Post Reply
|
Page 123 4> |
 Tweet
Tweet
|
| Forum Jump | Forum Permissions You cannot post new topics in this forum You cannot reply to topics in this forum You cannot delete your posts in this forum You cannot edit your posts in this forum You cannot create polls in this forum You cannot vote in polls in this forum |


 Topic Options